Damping Off: Why Your Seedlings Collapse at the Soil Line

Damping off is a fungal and water-mold disease that attacks seedlings right at the soil surface, pinching the stem until the plant falls over while it's still green. It's caused by conditions, not bad luck or bad seed, and once a seedling has toppled it cannot be saved. There is no spray, no rescue, no drying it out. Prevention is the entire strategy, and it's mostly about water, air, and clean gear.
Starting seeds this season? Our free seed starting calendar gives you sowing dates by zone so you're not nursing leggy transplants for six extra weeks, which is when tray problems compound.
Updated August 2026
A note on numbers. This page gives you timing, quantities and spacing, not dollar figures. Seed, plant and material pricing varies by region, by supplier and by season, and we do not set any of it. Work out what you need here, then price the list at two or three local suppliers.
Here's the situation this fixes. You had a beautiful tray. Three days later half of it is lying flat, stems still green, leaves still perfect, and you have no idea what happened overnight. That's damping off, and the tray next to it is probably next.
What Damping Off Looks Like
The tell is the stem, not the leaves.
Look at the point where the stem meets the mix. In a damped-off seedling that spot is thin, dark, water-soaked, and pinched, like someone squeezed it between two fingernails. The stem above it is still green and turgid. The cotyledons and first true leaves often look completely healthy for a day or two after the plant has already fallen over, which is what makes it so confusing.
Compare that to the other things that knock seedlings down:
| Symptom | Likely cause | What's different |
|---|---|---|
| Pinched, dark, wet stem at soil line, plant green | Damping off | Failure point is at the surface, leaves still healthy |
| Stem thin and stretched along its whole length, leaning | Too little light | No dark lesion, stem is uniformly weak |
| Leaves wilted first, then collapse | Underwatering or root rot lower down | Wilt precedes the fall |
| Seedling chewed off cleanly at the base | Fungus gnat larvae or a cutworm | Cut is clean, no water-soaked tissue |
| White fuzz on the mix surface, seedlings fine | Harmless saprophytic mold | Cosmetic, but it signals too much moisture |
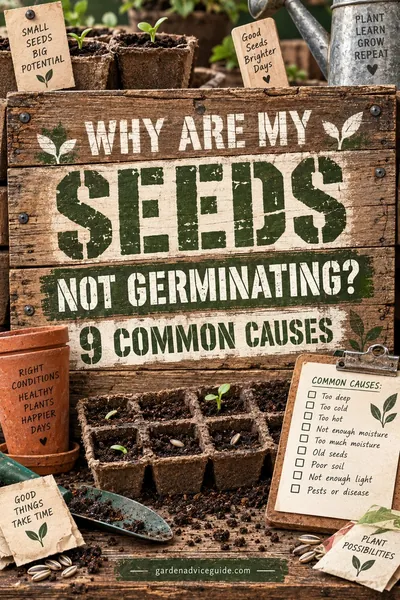
| Seeds never came up at all | Pre-emergence damping off, or old seed | Dig one up, a rotted mushy seed means disease |
That last row matters. Pre-emergence damping off kills the seed or the sprout before it ever reaches the surface, and gardeners almost always blame the seed packet. If a tray germinates at 20% when the packet says 85%, dig up three ungerminated seeds. Firm and intact means a germination problem. Soft, brown, and mushy means the same organisms that flatten seedlings got there first.
The organisms involved are usually Pythium or Rhizoctonia, sometimes Fusarium or Phytophthora. You don't need to tell them apart, because the prevention is identical for all of them. They live in soil, in dust, on reused trays, and in bags of mix left open in a garage.
What Causes Damping Off: It's Conditions, Not Luck
The pathogens are close to universal. They're probably present in some form in most seed-starting setups already. What decides whether you lose a tray is whether you gave them the conditions they need.
Overwatering. This is the big one. Saturated mix has no air in it, roots suffocate and weaken, and Pythium in particular moves through free water using swimming spores. A mix that is constantly wet at the surface is the single strongest predictor of a wipeout.
Poor air movement. Still air over a tray means the surface never dries and humidity sits near 100%. Humidity domes are useful for germination and dangerous the moment seedlings emerge. Leaving a dome on for a week past germination is one of the most common ways people lose a tray.
Cold, wet mix. Cold soil slows seedling growth without slowing the pathogens much, which shifts the race in their favor. Tomatoes sown into 55°F mix sit there vulnerable for two weeks. The same seed at 72°F is up in five to seven days and past the most fragile stage.
Dirty containers and reused mix. Last year's trays carry last year's spores in the crusted residue at the bottom. Reused potting mix carries pathogens plus depleted structure that holds too much water, the same collapse that rots a plant left in one pot for a decade.
Sowing too densely. Crowded seedlings shade the surface so it never dries, block airflow at soil level, and touch each other, which is how the disease walks across a tray. It also makes thinning traumatic if you pull instead of cut.
A crust of algae or salts on the surface. Green algae on the mix is a moisture signal, and it further seals the surface against drying.
The Prevention Checklist
Run this list once and damping off mostly stops being a thing that happens to you.
| Step | What to do | Why it works |
|---|---|---|
| Sterile mix | Use a fresh bag of seed-starting mix, not garden soil, not last year's leftovers | Starts with a low pathogen load and a texture that drains |
| Clean containers | Scrub with hot soapy water, then soak 10 minutes in a 1:9 bleach solution, rinse | Removes the spore reservoir in old residue |
| Bottom watering | Water from a tray underneath, never from above | Keeps the stem zone and surface dry |
| Airflow | Small fan on low, running 8 to 12 hours a day | Dries the surface, strengthens stems |
| Dome timing | Remove the humidity dome as soon as 50% of seeds sprout | Removes the 100% humidity that the pathogens need |
| Correct temperature | Heat mat to 70 to 75°F for germination, then 60 to 65°F air | Fast germination beats slow infection |
| Sowing density | 2 seeds per cell, thin to 1 with scissors | Air reaches the soil line, disease can't bridge |
| Drainage | Every container has holes, never let a tray sit in standing water | No free water means no swimming spores |
| Light | Lights 2 to 4 inches above the leaves, 14 to 16 hours a day | Sturdy seedlings resist infection, leggy ones don't |
| Surface topping | A thin layer of coarse vermiculite or fine grit over the seed | Dries fast, keeps the stem base drier |
Two of these carry most of the weight: bottom watering and a fan. If you only change two things this season, change those.
Why Bottom Watering Helps, and How to Do It
Overhead watering does three bad things at once. It soaks the exact spot where infection happens, it splashes spores from cell to cell, and it compacts the surface so it dries even slower. Bottom watering avoids all three.
How to do it:
- Set your cell tray inside a solid tray with no holes.
- Pour about half an inch of room-temperature water into the bottom tray. Cold water out of the tap chills the mix and slows growth, so let it sit out or mix in a little warm.
- Wait 10 to 20 minutes. You'll see the surface of the mix darken as water wicks all the way up.
- Pour off whatever water is left. This step is the one people skip, and skipping it turns bottom watering into a permanent bog. Nothing should be sitting in water an hour later.
- Wait until the surface is dry and the tray feels noticeably light before you do it again. For most setups that's every two to four days.
Judge by weight, not by looks. Pick up a freshly watered tray and a dry one and feel the difference once. After that you'll know in a second whether a tray needs water, and you'll water about half as often as you used to.
Two extras that help. A thin quarter-inch layer of coarse vermiculite over the seed keeps the stem base dry while the roots below stay moist. And if your mix has gone hydrophobic and won't take up water from below, add a drop of dish soap to the water once to break the surface tension.
Sterilizing Trays, Pots, and Tools
New trays out of the package are fine. Anything reused needs cleaning, and the order matters.
- Wash first. Hot water, dish soap, a stiff brush. Get the crusted mix out of the corners and the drain holes. Bleach is deactivated by organic matter, so a dirty tray soaked in bleach is a dirty tray.
- Then disinfect. Soak 10 minutes in a 1:9 bleach solution, which is 1 part regular household bleach to 9 parts water. Wear gloves, work somewhere ventilated, and don't mix bleach with anything else.
- Rinse and air dry. Bleach residue is hard on young roots. Rinse well and let trays dry fully in sun if you can, since UV helps.
Alternatives that work: 70% isopropyl alcohol wiped on hard surfaces and tools, or a commercial horticultural sanitizer such as a hydrogen peroxide and peroxyacetic acid product if you're doing large volumes. Skip vinegar, which is not a reliable disinfectant at household strength.
Wipe your snips between trays too, especially if one tray is already showing symptoms.
The honest note on sterilizing soil at home. You'll find plenty of instructions for baking potting mix at 180 to 200°F for 30 minutes or microwaving it in a covered container. It does reduce the pathogen load. It also has three real problems.
First, it stinks, genuinely, and the smell stays in your kitchen for a day. Second, home ovens run uneven, so parts of the batch overheat while other parts never get hot enough to matter. Overheating above roughly 200°F can release manganese and generate ammonium and nitrite in the mix at levels that damage seedling roots, so a batch that gets too hot can hurt more than the disease would have. Third, and most important, you end up with a biological vacuum. Sterilized mix has no competing microbes left, so the first Pythium spore that blows in off your hands or a watering can recolonizes it with nothing to slow it down.
Our recommendation: don't sterilize mix at home. A fresh bag of commercial seed-starting mix is milled for drainage and arrives with a low pathogen load already, and it costs less than the tray of tomatoes you would lose plus the afternoon you would spend baking soil. Save your homemade and reused mix for potting up transplants, which are far less vulnerable.
Cinnamon and Chamomile: An Honest Assessment
These two come up in every seed-starting thread, so here's where the evidence actually sits.
Cinnamon. Ground cinnamon contains cinnamaldehyde, which has real, documented antifungal activity against Rhizoctonia, Pythium, and other fungi in laboratory tests, meaning on a petri dish at controlled concentrations. What's missing is evidence that dusting a spoonful of grocery-store cinnamon on the surface of a tray delivers a meaningful dose down at the soil line where infection happens. It probably slows surface mold a little. It is not a fungicide in any practical sense.
Chamomile tea. Chamomile contains some mildly antimicrobial compounds, and the folk practice is to mist seedlings with cooled tea. The evidence here is essentially anecdotal. And there's a real catch: applying it as a spray means adding water to the surface of the tray, which is precisely the condition you're trying to eliminate. If you use it at all, use it in the bottom-watering tray, not as a mist.
Hydrogen peroxide. Same category. Dilute 3% peroxide does kill spores on contact, but it breaks down within minutes in soil and doesn't provide lasting protection.
The verdict. All three are cheap and harmless, and none of them will save a tray with a dome on it, no fan, and wet mix. If sprinkling cinnamon makes you feel better about a tray, go ahead. Just don't let it substitute for the fan, the bottom watering, and the clean containers, which are the interventions that actually change outcomes. Treating a folk remedy as your defense is how people lose the tray twice.
Worked Example: Auditing a Tray That Failed
Here's the diagnostic walkthrough, with the numbers.
The tray: 72 cells of tomatoes and peppers, sown March 3. Germination looked good at day 7, roughly 60 of 72 up. By day 12, 38 cells were flat.
What the setup was:
- Humidity dome still on at day 12, nine days after germination started
- Watered from a can over the top, every morning, whether or not the tray needed it
- Heat mat left running at 78°F under the tray for the full 12 days
- Lights 10 inches above the seedlings on a 12 hour timer
- Trays reused from last year, rinsed but not disinfected
- No fan, tray sitting on a shelf in a closed spare room
Every single line above is a cause. That's the point. Damping off almost never has one cause, it has a stack of them.
The fix, in order of impact:
- Dome off at day 3, when half the cells had sprouted.
- Bottom water only, half an inch in the outer tray, poured off after 15 minutes, repeated only when the tray feels light. That moved watering from 12 times in 12 days to about 4.
- A 6 inch clip fan on the lowest setting, 4 feet away, aimed across the tray rather than at it, on a timer for 10 hours a day.
- Heat mat off once germination finished, air temperature down to 62 to 65°F.
- Lights lowered to 3 inches above the leaves, timer up to 15 hours.
- Trays washed and soaked in bleach solution before the next sowing.
The bleach math, since people ask: for a 2 gallon tub, that's 256 fluid ounces total. At 1 part bleach to 9 parts water you need 25.6 ounces of bleach, call it 3 cups, to 230 ounces of water. Ten minute soak, then rinse.
The result on the resown tray: 68 of 72 cells, zero losses to damping off. Same room, same shelf, same seed lot. The conditions were the disease.
What to Do Once It Starts in a Tray
You can't cure the seedlings that have already fallen. You can usually stop it from taking the rest.
- Remove the collapsed seedlings and the mix around them. Lift them out with the plug if you can. Don't compost them, bag them.
- Isolate the tray. Move it away from your other trays immediately, since watering and handling move spores between trays faster than anything else.
- Get the dome off and a fan on. Surface drying is your fastest lever. Aim across the tray, not at it, on the lowest useful setting.
- Stop all overhead watering. Bottom water only from here, and let the surface dry between waterings even if the seedlings look slightly thirsty. Slightly dry is survivable, wet is not.
- Raise the temperature into the growing range, 65 to 70°F air, and get the lights closer so the survivors grow fast. Growth is a defense.
- Thin crowded cells with scissors to open up airflow at the soil line. Cut at the surface, never pull, because pulling disturbs the roots of the neighbor you're keeping.
- Accept the losses and resow if you have time. If a tray is more than half gone, dump it, clean the tray properly, and start over with fresh mix. Nursing 20 damaged survivors for four weeks usually produces 20 weak transplants, and weak transplants disappoint you again in June.
That last point is the hard one. Seed is cheap and time is not. Check your seed starting calendar to see whether you still have room to resow for your zone, and if you do, resowing beats rescuing almost every time.
Once you have healthy seedlings through this stage, the next two hurdles are gradual outdoor acclimation, covered in our guide to hardening off seedlings, and getting the timing right in our guide on when to transplant seedlings.
FAQ
Can a seedling recover from damping off?
No. Once the stem has been pinched and darkened at the soil line, the plant's vascular tissue is destroyed at that point and it cannot repair it. The seedling will not stand back up, no matter what you spray on it. Focus on protecting the seedlings that haven't been hit yet.
What does damping off look like on seedlings?
Look at the base of the stem right where it meets the mix. You'll see a thin, dark, water-soaked, pinched spot, and the seedling folds over there while the leaves above are still green and healthy. If the stem is uniformly thin and stretched along its whole length instead, that's too little light, not disease.
Does cinnamon really stop damping off?
Not reliably. Cinnamaldehyde in cinnamon has documented antifungal activity in laboratory tests, but there's no good evidence that dusting a tray delivers a useful dose at the soil line. It's harmless and it may slow surface mold slightly. Treat it as a bonus, never as your prevention plan.
How often should I water seedlings to avoid damping off?
By weight, not by schedule. Bottom water only when the tray feels light and the surface is dry, which for most indoor setups is every two to four days rather than daily. Pour off any water left in the bottom tray after 15 to 20 minutes so nothing sits saturated.
Do I need a fan for seed starting?
It's the second most valuable thing you can add after bottom watering. A small clip fan on low for 8 to 12 hours a day dries the mix surface, breaks up the humid layer sitting over the tray, and produces noticeably sturdier stems. Aim it across the seedlings, not straight at them.
Can I reuse potting mix for seed starting?
Don't. Used mix carries pathogens from the previous crop and its structure has broken down, so it holds more water and less air, which is exactly the combination damping off needs. Use a fresh bag of seed-starting mix for trays and save the old material for potting up larger transplants or topping outdoor containers.
Is white mold on my seed tray the same as damping off?
Usually not. Fuzzy white growth on the surface is typically a harmless saprophytic mold feeding on organic matter in the mix, and seedlings growing through it are often fine. It is a warning sign though, because it means the surface is staying too wet. Increase airflow, cut back watering, and scrape it off.
Should I use a fungicide on damping off?
Home fungicide options are limited and none of them will revive a collapsed seedling. Commercial growers use targeted drenches, but for a home tray the return on chemical treatment is poor compared with fixing airflow, watering, temperature, and container hygiene. If damping off keeps recurring after you've corrected all four, the problem is almost always still moisture, not a missing product.