Spider Plant Care

Spider plant care comes down to four habits: bright indirect light, a thorough soak whenever the top inch of soil is dry, a pot that drains freely, and water that is low in fluoride and salts. Do those and the plant grows into an arching fountain of striped foliage, throws long stems of white flowers, and hangs baby plants off the ends of them all summer. Chlorophytum comosum has been a windowsill staple for a hundred years because it tolerates almost everything except a soggy pot and hard tap water.
The complaints are just as predictable as the plant. Brown tips on every leaf. Pale, washed-out stripes. A plant that has never once produced a pup. All three have specific causes and specific fixes, and none of them require you to buy anything unusual.
Not sure if it is thirsty or drowning? Use our free watering guide for the container lift test and a symptom table that separates overwatering from underwatering.
Updated September 2026
Spider Plant Care at a Glance
| Need | What the plant wants | What goes wrong if you miss it |
|---|---|---|
| Light | Bright, indirect. East window, or a few feet back from a south or west one | Direct afternoon sun bleaches and scorches the leaves; deep shade fades the stripes and stops pups |
| Water | Soak when the top inch is dry, then drain completely. Roughly every 7 to 10 days in summer, every 2 to 3 weeks in winter | Constantly wet soil rots the fleshy roots; bone-dry soil browns the tips |
| Water quality | Rainwater, distilled, or tap water left to sit. Low fluoride matters | Fluoride and softened water burn the leaf tips brown |
| Soil | Standard potting mix with a handful of perlite | Dense or garden soil holds water around the tubers |
| Pot | Drainage hole, snug rather than roomy | An oversized pot stays wet for weeks and suppresses pups |
| Temperature | 60 to 80°F. Keep above 50°F | Cold drafts cause limp, blackened leaf edges |
| Humidity | Average room humidity is fine, 40 percent and up is better | Very dry winter air adds to tip browning |
| Fertilizer | Half strength, monthly, spring through late summer only | Over-feeding is the single biggest cause of brown tips |
That table is the entire plant. Everything below is the detail behind each row.
Light: Bright and Indirect, and What the Stripes Tell You
Spider plants grow wild on the forest edges of southern Africa, under the light shade of taller plants. They are built for bright light that has been filtered by something, which in a house means near a window but not baking in the glass.
- Best: an east-facing window with soft morning sun, or a north window that is large and unobstructed.
- Very good: three to five feet back from a south or west window, or right up against one behind a sheer curtain.
- Too much: unfiltered afternoon sun. The green fades to a washed-out yellow, then papery tan patches appear in the middle of leaves. That is scorch, not disease.
- Too little: a dim hallway or an interior corner. The plant survives for years but grows loose and floppy, the variegation narrows and greens over, and it will never send out a single pup.
The variegation is a useful gauge. A well-lit variegated spider plant has crisp, high-contrast stripes. If the white or cream bands are shrinking and the leaf is drifting toward solid green, the plant is reaching for more light. If the stripes are there but the whole leaf looks bleached and pale, it is getting too much. Move it a few feet and give it a month before you judge.
All-green forms such as the plain Chlorophytum comosum tolerate lower light better than the striped cultivars, because they have more chlorophyll to work with. That does not mean they prefer it.
How Often to Water a Spider Plant
Spider plants store water in thick white tubers under the soil, so they handle a missed week far better than a soggy month. Water thoroughly when the top inch of soil is dry, let it run out of the drainage holes, and empty the saucer. In a normal living room that lands somewhere around every 7 to 10 days from spring through summer, and every 2 to 3 weeks in winter when growth slows and the light is weaker.
Check the soil, never the calendar. Push a finger in to the first knuckle. Dry at that depth means water. Still damp means wait two days and check again. A plant in a small clay pot in a sunny window might need water twice a week in July, while the same plant in a large plastic pot in a north room might go three weeks in January.
The signs on either side of correct:
- Thirsty: leaves lose their stiffness and fold slightly, the whole plant looks softer, tips go brown and crisp. The tubers shrink and the pot feels light.
- Drowning: leaves turn yellow from the base of the clump outward, the crown feels soft, the soil smells sour, and there may be fungus gnats hovering. The pot feels heavy for days after watering.
Yellowing that starts with the oldest, lowest leaves and moves up is almost always too much water. Browning that starts at the tip of every leaf at once is almost always water quality, which is the next section. Succulents on the same windowsill send confusingly similar signals either way, and our page on telling an overwatered succulent from an underwatered one covers those.
A worked example. A mature spider plant in a 6-inch plastic pot, in an east window at 70°F, in a peat-based mix with a third perlite, typically wants a full soak every 8 or 9 days from April through September. Come November, with lower light and cooler nights, the same pot stretches to about 18 days. Hanging baskets dry out faster than pots on a table because warm air collects near the ceiling, so a basket in the same room might run on a 6-day cycle in summer. That is why the finger test beats a fixed schedule every time.
Why Spider Plants Get Brown Tips
Brown tips are the number one spider plant question, and there are five causes worth knowing. They can stack, so check the whole list rather than stopping at the first match.
| Cause | What it looks like | The fix |
|---|---|---|
| Fluoride in tap water | A narrow brown or dark tan tip on nearly every leaf, with a thin yellow halo just behind it. Progresses slowly over months | Switch to rainwater, distilled water, or reverse osmosis. Letting tap water sit overnight removes chlorine but not fluoride |
| Softened water | Same tip burn, often faster and with a white crust on the soil surface | Never use water from a salt-based softener. Fill from an outside spigot or the kitchen bypass tap |
| Fertilizer salt buildup | Brown tips plus a white or yellow crust on the soil and around the pot rim | Flush the pot: run water through it for two full minutes, four times the pot volume. Then feed less |
| Letting it dry too far | Crisp brown tips on the newest growth, whole leaves creasing and folding | Shorten the interval by two or three days. Soak the pot in a sink for 20 minutes if it has gone very dry |
| Dry winter air | Fine browning on tips across the whole plant, worst near a heat vent | Group plants together, set the pot on a pebble tray with water below the pot base, or move it away from the vent |
A few practical notes on the fluoride point, because it is the one most people never suspect. Municipal water in much of the United States is fluoridated at around 0.7 parts per million, which is harmless to drink and quietly damaging to a small group of houseplants. Spider plants, dracaenas, cordylines, and prayer plants are the usual victims. The damage accumulates in the leaf tip, which is the end of the line for the plant's plumbing, so that is where the browning shows. Collected rainwater is free and works perfectly. Distilled water from the grocery store is the easy indoor option.
Once a tip has gone brown, it does not turn green again. Trim it if the look bothers you. Cut at an angle following the natural taper of the leaf rather than straight across, and leave a hair of brown behind rather than cutting into green tissue, which just creates a fresh wound that browns again.
Soil, Pots and Repotting
Any decent all-purpose potting mix works, improved with a handful of perlite or bark for every few quarts so the mix stays open. Straight garden soil compacts into a brick in a pot and holds water against those fleshy tubers, which is exactly what rots them. Our container gardening guide covers why garden soil fails indoors and what to use instead.
Choose a pot with a drainage hole and keep it snug. Spider plants flower and pup more freely when their roots are a little crowded, and an oversized pot holds a reservoir of wet soil the roots cannot reach for weeks. One size up at a time, and no more.
Signs it is time to repot:
- White tuberous roots pressing up out of the soil surface, or coiling out of the drainage holes.
- The pot dries out within two or three days no matter how much you water.
- Watering makes the soil rise and spill over the rim because there is more root than soil in there.
- The plastic pot is visibly bulging or cracked. Spider plants really do split their pots.
Repot in spring, into a container one size larger. Tip the plant out, tease the outer roots loose, cut away anything soft or dark, and set it at the same depth in fresh mix. If the clump has become enormous, this is the moment to divide it: pull or cut the crown into two or three sections, each with a fair share of roots and leaves, and pot them separately. Water in and keep it out of direct sun for a week.
Fertilizer, and Why Less Is More
Spider plants are light feeders that show fertilizer damage before they show any benefit. A balanced liquid houseplant fertilizer at half the labeled strength, once a month from April through August, is plenty. Skip September through March entirely, when the plant is not growing and the salts have nowhere to go.
If the leaf tips are browning and there is a pale crust on the soil, stop feeding and flush the pot. Set it in a sink or tub and pour water through slowly until roughly four times the pot volume has drained out. Let it drain fully, then hold off on fertilizer for a couple of months. Plants that get flushed twice a year, spring and fall, rarely build up salt at all.
Too much nitrogen also has a quieter cost: a heavily fed plant puts everything into leaves and produces very few pups. A slightly hungry, slightly rootbound, well-lit spider plant is the one that covers itself in babies.
Spider Plant Pups: Why They Appear and How to Root Them
Those dangling babies are the plant's whole reproductive strategy. A mature spider plant sends out a long, wiry stem called a stolon, which opens small white star-shaped flowers, and then forms a miniature plant at each node. In the wild the stolon arches down until the pup touches soil and roots itself.
If your plant has never pupped, it is one of these three:
- Too young. Most spider plants need to be a year old or more, with a full crown, before they put energy into stolons.
- Not enough light. This is the most common reason. A plant in a dim corner has no surplus energy to spend. Move it to bright indirect light and give it a season.
- Too much pot or too much fertilizer. Both push the plant to keep growing roots and leaves rather than reproducing. Let it fill its pot and cut the feeding back.
Day length plays a role too. Spider plants tend to set stolons as days shorten in late summer and fall, which is why so many plants suddenly bloom in September after a summer outdoors.
To root a pup, wait until it has visible nubs of aerial root at its base, which look like small white or tan bumps. Then pick a method:
| Method | How | Timing | Best for |
|---|---|---|---|
| Root while attached | Set a small pot of moist mix next to the parent, pin the pup onto the surface with a bent paperclip, leave the stolon connected. Cut the stolon once the pup resists a gentle tug | 2 to 3 weeks | The highest success rate, no wilting, no guesswork |
| Cut and pot | Snip the pup off the stolon, press the base a half inch into moist mix, keep it lightly moist and bright | 3 to 4 weeks | Speed, and pups from a hanging basket you cannot easily reach |
| Water rooting | Suspend the base in a jar of water, changing it weekly. Pot up once roots reach an inch or two | 1 to 2 weeks to roots | Watching the process, but water roots need a transition |
The attached method is the one to use if you want it to work every time. The pup keeps drawing water and sugars from the parent while it builds its own root system, so it never checks or wilts.
Two or three pups potted together in one 4-inch container make a full plant much faster than one alone. New growth from the center of the crown means the pup has rooted and taken hold.
Summering a Spider Plant Outdoors
A summer outside does more for a spider plant than anything you can do indoors. Higher light, real air movement, and rainwater instead of tap water produce thicker leaves, brighter stripes, and a heavy flush of pups in late summer.
The rules are simple:
- Move it out once nights stay above 50°F, not before. Cold nights cause limp, dark leaf edges.
- Full shade or dappled light only. A covered porch, under a tree, or the north side of the house. Direct sun scorches leaves that grew indoors within a day or two.
- Ease it in. Give it a week in deep shade before you move it to its final spot, the same hardening logic used for hardening off seedlings.
- Expect to water far more often. A hanging basket outdoors in July may need water daily.
- Bring it back in when nights approach 50°F. Check your average first fall frost with our frost date lookup so you have a safe margin. Frost kills a spider plant outright.
- Inspect before it comes in. Look under leaves and around the crown for hitchhikers, and hose the foliage off.
Grown permanently outdoors, spider plants are hardy only in USDA zones 9 through 11, where they make a good shaded ground cover. Anywhere colder they are houseplants with a summer vacation. Check where you sit with our growing zones lookup.
Curly, Bonnie, Variegatum and the Rest
All spider plants take identical care. The differences are cosmetic, and the names get muddled in stores.
| Cultivar | What it looks like | Notes |
|---|---|---|
| Vittatum | Green edges, broad cream stripe down the center | The old-fashioned one, and still the most common in hanging baskets |
| Variegatum | Cream edges, solid green center. The reverse of Vittatum | Slightly slower growing, tidier habit |
| Bonnie | Vittatum coloring on tightly curling, corkscrew leaves | A compact plant that suits a shelf better than a basket |
| Curly, or Curly Bonnie | Used interchangeably with Bonnie by most sellers | Assume they are the same plant unless the label says otherwise |
| Ocean | Cream edges, compact, very dense clump | Newer patented selection, stays small |
| Hawaiian, sold as Golden Glow | New leaves emerge with a champagne stripe that fades to solid green | The variegation is temporary by design, not a light problem |
| Green, the species | Solid green, no stripe | Handles lower light better than any striped form |
The curl in Bonnie and Curly types relaxes in low light. If your curly spider plant is straightening out, move it somewhere brighter and the new growth will curl again.
Is a Spider Plant Toxic to Cats?
No. The ASPCA Animal Poison Control Center lists spider plant as non-toxic to cats, dogs and horses. That makes it one of the safest plants you can hang in a house with animals.
Cats are unusually drawn to them, and the reason is not toxicity. The dangling pups move in a draft like prey, and the leaves contain mild compounds that some cats find mildly stimulating in the way catnip is. A cat that eats a lot of any plant fiber may vomit, so hang the plant high if yours is a committed chewer, but there is no poison involved.
Troubleshooting Spider Plant Problems
| Symptom | Most likely cause | What to do |
|---|---|---|
| Brown tips on nearly every leaf | Fluoride or softened water, or fertilizer salts | Switch water source, flush the pot, cut feeding back |
| Lower leaves yellowing and softening | Overwatering | Let the top inch dry before every watering, check the drainage hole is clear |
| Whole plant pale and washed out | Too much direct sun | Move back from the glass or add a sheer curtain |
| Stripes fading toward solid green | Not enough light | Move to an east window or closer to a bright one |
| Leaves creased, folded, limp, soil dry | Underwatering | Soak in a sink of room temperature water for 20 minutes, then drain |
| No pups, ever | Low light, oversized pot, or too much fertilizer | Brighter spot, snug pot, half-strength feed only in summer |
| Dark, mushy leaf bases at the crown | Crown rot from water sitting in the center | Unpot, cut away all soft tissue, repot in fresh mix, water at the soil edge |
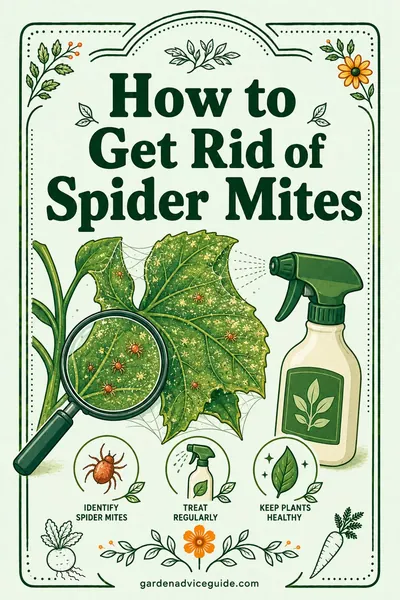
| Fine webbing between leaves, stippled specks | Spider mites, which share a name with this plant and nothing else | See our page on spider mites for identification and treatment |
Spider plants also grow happily alongside the other easy foliage plants, and the care overlaps almost exactly. Our Chinese evergreen care page covers the low-light companion that handles a dark corner better than a spider plant ever will. If you want something at the opposite end of the difficulty scale, our Venus fly trap plant care guide explains why that plant needs distilled water for the same reason a spider plant prefers it, and a dormancy on top.
FAQ
How often should I water my spider plant?
Water thoroughly when the top inch of soil is dry, which usually falls every 7 to 10 days in spring and summer and every 2 to 3 weeks in winter. Let the water run out of the drainage holes and empty the saucer. The exact interval depends on pot size, material, light and the room, so test with a finger rather than following a fixed schedule.
Why does my spider plant have brown tips?
Most often fluoride in tap water, softened water, or a buildup of fertilizer salts in the soil. Letting the soil go bone dry and very dry winter air add to it. Switch to rainwater or distilled water, flush the pot with four times its volume of water, feed only at half strength in summer, and keep the plant away from heat vents.
Can I cut the brown tips off my spider plant?
Yes. A browned tip is dead tissue and will not recover, so trimming is purely cosmetic and harmless. Cut at an angle that follows the natural point of the leaf and leave a thin line of brown rather than cutting into green tissue, since a fresh cut into living leaf just browns over again.
How do I get my spider plant to make babies?
Give it bright indirect light, keep it slightly rootbound in a snug pot, and go easy on the fertilizer. Most plants need to be at least a year old before they send out stolons, and many set them in late summer and fall as days shorten. A summer spent outdoors in the shade is the fastest way to trigger a heavy flush of pups.
How do I propagate a spider plant from a pup?
Wait until the pup shows small root nubs at its base. The most reliable method is to set a small pot of moist mix beside the parent, pin the still-attached pup onto the surface, and cut the stolon two or three weeks later once the pup resists a gentle tug. Cutting first and potting directly also works and takes three to four weeks.
Are spider plants toxic to cats and dogs?
No. The ASPCA lists spider plant as non-toxic to cats, dogs and horses. Cats are attracted to the dangling pups because they move like prey and the foliage is mildly stimulating to some animals, but no poison is involved. A cat that eats a large amount of any plant may still vomit from the fiber.
When should I repot a spider plant?
Repot in spring when tuberous white roots push up out of the soil surface, coil out the drainage holes, or bulge the pot. Move up one pot size only, since an oversized container stays wet and discourages pups. A very large clump can be divided into two or three sections at the same time, each with its own roots and leaves.
Why is my spider plant losing its stripes?
Fading variegation means not enough light. The plant compensates by producing more chlorophyll, so the cream bands narrow and the leaf drifts toward solid green. Move it to an east window or within a few feet of a brighter one, and judge the new growth after a month rather than the old leaves, which will not change back.