Tomato Leaves Turning Yellow

If only the bottom leaves are turning yellow on an otherwise healthy, fruiting plant, that's almost always normal. The plant is pulling nitrogen out of its oldest, shadiest leaves and sending it to the fruit, and it does this every single season. What matters is yellowing that spreads upward, hits new growth at the top, or shows up alongside spots, webbing, or wilting, because those point to a real problem you can still fix.
So the first question isn't "why are my tomato leaves turning yellow," it's where they're turning yellow. Location is the diagnosis.
Most yellowing traces back to watering. Get your plant's weekly water number with our free watering guide before you reach for fertilizer or a spray.
Tomato Leaves Turning Yellow: The Diagnostic Table
Find the row that matches what you're actually looking at. Go outside and check the pattern before you read further, because two of these look similar from a distance and get treated completely wrong.
| Symptom pattern | Likely cause | Confirm by | What to do |
|---|---|---|---|
| Bottom leaves only, gradual, no spots, plant fruiting well | Normal aging (senescence) or mild nitrogen draw to fruit | New growth at the top is green and vigorous | Nothing. Snip them off if they touch soil |
| Bottom leaves yellow with brown spots that have concentric rings, moving upward | Early blight | Look for target-like rings inside the brown spot, plus a yellow halo | Remove affected leaves, mulch, improve airflow, consider fungicide |
| Bottom leaves with tiny tan spots, dark margins, dozens per leaf | Septoria leaf spot | Spots stay small (1/8 inch) and there are far more of them than early blight | Same treatment as early blight |
| Yellow between the veins, veins stay green, on OLD lower leaves | Magnesium deficiency | Green veins form a clear net pattern on a yellow background | Soil test first, then magnesium if confirmed |
| Yellow between the veins on NEW top growth, veins green | Iron chlorosis, usually a high-pH lockout | Test soil pH. Above 7.0 is the tell | Fix pH, use chelated iron (EDDHA) as a short-term patch |
| Whole plant pale yellow-green, growth slowed, oldest leaves worst | Nitrogen deficiency | Soil drains fine and isn't soggy | Sidedress with nitrogen and water it in |
| Whole plant yellow, soil wet 3 inches down, leaves droop and don't perk up at night | Overwatering, root suffocation | Dig down 3 inches. If it's muddy, that's your answer | Stop watering, improve drainage, wait |
| Yellowing on one side of the plant, or one branch, wilting in the day | Fusarium or Verticillium wilt | Cut the main stem near the base. Brown streaks in the vascular ring confirm it | No cure. Remove plant, rotate, buy VF-resistant varieties |
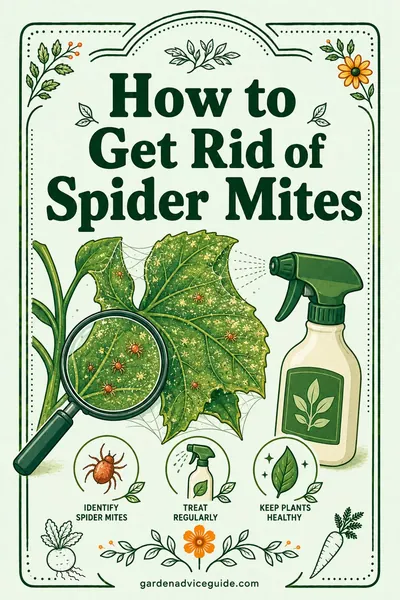
| Fine yellow stippling like spray paint, fine webbing on leaf undersides | Spider mites | Hold white paper under a leaf and tap. Moving specks confirm | Blast with water, spray undersides, raise humidity |
| Yellow, mottled leaves with sticky shine, black sooty film, ants | Aphids or whiteflies | Check undersides. Whiteflies fly up in a cloud when disturbed | Insecticidal soap on undersides, repeat every 5-7 days |
| Yellow leaves curling upward, new growth stunted and cupped | Virus (curly top, yellow leaf curl) or herbicide drift | No insects, no spots, no pattern to the soil | Remove the plant if viral. Nothing else works |
Now the detail on each one, in the order you're most likely to be dealing with.
1. Bottom Leaves Only, Gradual, No Spots
This is the most common reason tomato leaves turn yellow and the one that panics people the most.
A tomato plant is a factory that prioritizes fruit. Nitrogen and magnesium are both mobile nutrients, meaning the plant can pull them out of an old leaf and move them to where they're needed. The oldest leaves are at the bottom, they're shaded by everything above them, and they've stopped earning their keep photosynthetically. So the plant strips them and lets them die.
You'll see this most from mid-July onward on a plant carrying a heavy fruit load. The yellowing is even across the leaf, there are no spots, and the top two-thirds of the plant looks great.
What to do: honestly, nothing. Snip off leaves that are more than half yellow, especially any touching or within 6 inches of the soil, because those are the ones that catch soil-splashed fungal spores. Use clean snips and cut close to the stem. Don't strip the plant bare in a panic. Every leaf you remove is sugar you're not sending to a tomato.
If the whole plant is also looking pale and growth has slowed, that's nitrogen deficiency instead, which is section 5.
2. Bottom Leaves With Brown Target-Ring Spots: Early Blight
This is the one people mistake for section 1, and the difference costs you the plant's lower half by September.
Early blight (caused by Alternaria linariae) starts on the lowest leaves because its spores live in soil and splash up when it rains or you water overhead. You get a brown spot, usually a quarter to half an inch, and inside it are concentric rings like a shooting target. Around the spot the leaf goes bright yellow. Enough spots on one leaf and the whole leaf yellows and drops.
Then it moves up. A leaf at a time, week by week, until the plant is a bare stem with fruit hanging on it and sunscald on the exposed tomatoes.
University of Minnesota Extension describes the same progression and makes the point that early blight is nearly universal in humid summers, so the goal is slowing it rather than eliminating it.
What to do:
- Remove affected leaves as soon as you see them, and bag them. Don't compost.
- Mulch heavily. Three inches of straw or shredded leaves under the plant breaks the splash cycle, which is the single most effective thing on this list.
- Water at the soil line, never overhead, and water in the morning so leaves dry fast.
- Open the plant up. Strip the bottom 12 inches of foliage entirely on an established plant so air moves through.
- Fungicide if it's early in the season. Chlorothalonil or copper on a 7 to 10 day schedule slows spread. It's protective, not curative, so it does nothing for leaves already spotted.
For the full identification walkthrough and how to tell early blight from late blight (which is a genuine emergency), see our guide to tomato blight.
3. Yellow Between Green Veins on Old Leaves: Magnesium
Look closely at the yellow leaf. If the veins are still bright green and the tissue between them has gone yellow, so the leaf looks like a green net over a yellow background, that's interveinal chlorosis.
On older, lower leaves, interveinal chlorosis usually means magnesium. Magnesium is mobile, so the plant robs old leaves first, which is why it shows up at the bottom. It's common in sandy soils, in containers that have been watered heavily all season, and in beds that have been fed high-potassium fertilizer, because potassium and magnesium compete for uptake.
What to do: get a soil test before you treat. This matters, because Epsom salt (magnesium sulfate) is the most over-applied product in home gardening and adding it to soil that already has enough magnesium does nothing useful and can push calcium out of balance.
If a test confirms low magnesium, a foliar spray of 1 tablespoon of Epsom salt per gallon of water, sprayed on the leaves, gives the fastest visible response. Soil-applied magnesium works too but takes weeks. Dolomitic lime is the long-term fix if your pH is also low, because it supplies both calcium and magnesium.
Leaves that already yellowed won't turn green again. Judge success by the new growth.
4. Yellow Between Veins on New Growth: Iron Lockout
Same net pattern, opposite end of the plant. When the interveinal yellowing is on the newest leaves at the top while the old leaves stay green, that's iron.
Here's the part most articles get wrong: this is almost never a lack of iron in your soil. Iron is one of the most abundant elements in the ground. The problem is that iron becomes chemically unavailable to plant roots as soil pH climbs. Above about 7.0, and definitely above 7.5, the iron is right there and the plant can't take it up. Gardeners in the alkaline soils of the West and Southwest see this constantly.
Iron is immobile in the plant, so it can't be pulled from old leaves, which is why the deficiency shows on new growth only. That immobility is your diagnostic clue.
What to do:
- Test your pH. Anything above 7.0 and you have your answer. The target range for tomatoes is 6.2 to 6.8.
- Lower pH slowly with elemental sulfur applied per your soil test, worked in the fall for next season. This is a multi-season project, not a weekend fix.
- Use chelated iron in the meantime. For high-pH soil, ask for EDDHA chelate specifically. The cheaper EDTA chelate falls apart above pH 6.5 and does nothing where you need it most.
- Check that you're not overwatering. Saturated soil also blocks iron uptake, and the symptom looks identical.
5. Whole Plant Pale: Nitrogen or Drowning Roots
When the entire plant is a washed-out yellow-green rather than a healthy dark green, and growth has visibly stalled, you have one of two problems and they need opposite treatments.
Nitrogen deficiency starts at the bottom and works up, because nitrogen is mobile and gets moved to new growth. The leaves are uniformly pale, not spotted, and the plant is small for the date. It's common in containers after 6 to 8 weeks (potting mix runs out of nutrients fast), in beds with lots of fresh wood chips or sawdust worked in, and after a stretch of heavy rain that leached the bed.
Fix it with a nitrogen sidedress: about a tablespoon of a nitrogen-heavy fertilizer per plant, scratched into the soil 6 inches out from the stem, and watered in well. You should see darker new growth in 7 to 10 days. Don't overdo it. Excess nitrogen gives you a five-foot green monster with six tomatoes on it.
Root suffocation from overwatering produces the same pale yellow, but the plant will also droop, and the drooping doesn't recover overnight. Roots need oxygen. Waterlogged soil has none, roots start dying, and a plant with dying roots can't take up nitrogen even when the nitrogen is there. Feeding it makes things worse.
Which is why the next section is the one to read before you do anything.
Overwatering vs Underwatering: How to Tell Them Apart
Both produce yellow leaves and wilting. Both look like a thirsty plant. Gardeners kill more tomatoes by watering a drowning plant than by any disease.
Three checks settle it in about a minute.
Check 1: Dig down three inches. Not the surface. The top inch of any bed in July looks bone dry by noon and tells you nothing. Push a finger, a trowel, or a wooden dowel three inches into the soil next to the plant.
- Dry and crumbly at 3 inches: underwatered. Water deeply.
- Damp like a wrung-out sponge: correct.
- Wet, muddy, or it smells sour: overwatered. Stop.
Check 2: Watch the time of day. A tomato that wilts at 2 p.m. in 95-degree heat and stands back up by 8 p.m. is not sick. That's normal midday transpiration outrunning root uptake, and it happens on well-watered plants. A plant that's still wilted at 8 p.m., or wilted first thing in the morning, has a root problem: either no water at all, or roots that have drowned.
Check 3: Read the wilt pattern. Underwatered plants wilt from the top and outer leaves inward, and the leaves feel thin and papery. Overwatered plants wilt limp and soft all over, often with yellowing at the same time, and the lower stem may look darkened or feel soft near the soil.
| Underwatered | Overwatered | |
|---|---|---|
| Soil at 3 inches | Dry, crumbly | Soggy, may smell sour |
| Evening recovery | Recovers by dusk | Stays wilted |
| Leaf feel | Thin, crisp, papery edges | Limp, soft, yellow |
| Yellowing pattern | Lower leaves, dry brown edges | Whole plant, uniform pale yellow |
| Fruit sign | Cracking after you finally water, blossom end rot | Splitting, bland flavor, root rot |
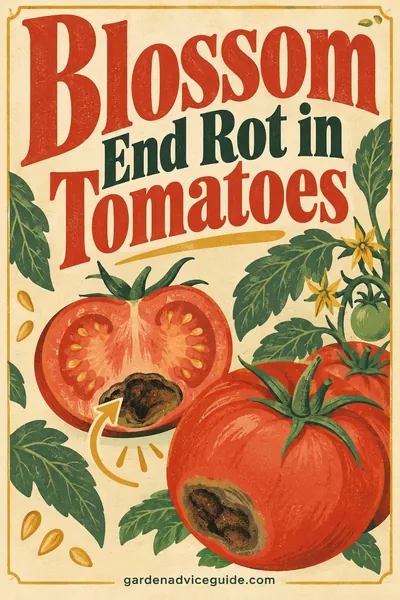
Inconsistent watering causes its own separate problem in the fruit, which we cover in blossom end rot. If you're seeing sunken dark patches on the bottom of your tomatoes as well as yellow leaves, watering consistency is the shared root cause of both. Late season yellowing also raises the question of when to take the fruit off, and our guide to when to pick tomatoes answers it with the breaker stage rather than a color chart.
Tomatoes want 1 to 2 inches of water per week in the ground, delivered in one or two deep soakings rather than a daily sprinkle. Containers are a different story and often need water every single day in heat.
6. One Side of the Plant, One Branch: Fusarium and Verticillium Wilt
This one has a distinctive signature: the yellowing is lopsided. One branch yellows and wilts while the branch directly across from it looks fine. Or the yellowing runs up one side of the plant. Sometimes it's half of a single leaf, split down the midrib.
That asymmetry happens because these soil fungi colonize the plant's water-conducting tissue, and they don't colonize all of it at once. Whatever is downstream of the blocked vessels wilts and yellows while the rest carries on.
Confirm it: cut the main stem an inch or two above the soil line with a clean knife. Look at the ring just under the bark. Healthy tissue is creamy white or pale green. Fusarium leaves a distinct chocolate-brown streak in that ring. Verticillium browning is usually lighter and can run higher up the stem.
Fusarium wilt tends to hit harder in warm soil and is more common in the South. Verticillium prefers cooler soil and is more of a northern problem. Verticillium also often shows a V-shaped yellow wedge at the leaf edge.
What to do: there's no cure and no spray. Pull the plant, bag it, and do not compost it. Then plan around it:
- Rotate. Don't put tomatoes, peppers, eggplant, or potatoes in that spot for at least 3 to 4 years.
- Buy resistance. The letters after a variety name on the tag are the whole point. V = Verticillium, F = Fusarium race 1, FF = races 1 and 2, N = nematodes. A VFN variety in infected soil will usually produce a full crop.
- Consider grafted plants or containers with fresh mix if your bed is badly infected. The fungi persist in soil for years.
Bacterial wilt and southern blight also cause sudden one-sided collapse in hot, humid regions, so if the stem shows a white fungal mat with tiny tan pellets at the soil line, that's southern blight instead.
7. Yellow Stippling and Fine Webbing: Spider Mites
Step back and the leaf looks yellowish and dull. Step in close and you see the yellowing is actually thousands of tiny pale dots, like someone misted the leaf with bleach. That stippling is individual feeding punctures.
Turn the leaf over. Fine webbing where the leaf meets the stem, or between leaflets, confirms two-spotted spider mites. They're roughly the size of a grain of ground pepper and you'll want a hand lens.
The reliable test: hold a sheet of white paper under a suspect leaf and tap it sharply. If specks land on the paper and start walking, you have mites.
Mites explode in hot, dry, dusty conditions, which is exactly the weather where people also start watering less. Plants along a dusty path or against a hot south wall get hit first.
What to do:
- Spray water forcefully on leaf undersides, three days running. Mites hate humidity and physical disruption, and this alone knocks populations down hard.
- Insecticidal soap or horticultural oil, applied specifically to undersides, repeated every 5 to 7 days for three cycles to catch newly hatched mites. Coverage is everything. A mite you don't hit is a mite that survives.
- Don't use a broad-spectrum insecticide. Pyrethroids kill the predatory mites that were keeping the population down and routinely cause worse outbreaks than the one you started with.
- Keep the plant watered and mulched. Drought-stressed tomatoes are mite magnets.
8. Yellow With Sticky Residue: Aphids and Whiteflies
If the yellowing leaves feel tacky, or there's a shiny film on the leaves below them, or a black sooty coating, you have a sap-sucking insect. That stickiness is honeydew, which is the polite name for insect waste, and the black film is sooty mold growing on it.
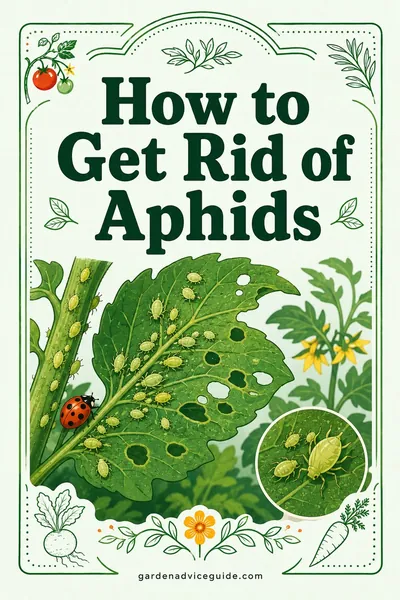
Aphids cluster on new growth and the undersides of upper leaves. Green, black, or peach-colored, pear-shaped, slow-moving. Ants marching up the stem are a strong hint, because ants farm aphids for the honeydew.
Whiteflies are tiny white specks on leaf undersides that fly up in a cloud when you brush the plant. They're a bigger deal than the feeding damage suggests, because whiteflies transmit tomato yellow leaf curl virus.
What to do: start with a hard water spray to dislodge aphids, then insecticidal soap on the undersides every 5 to 7 days. Yellow sticky traps help you monitor whitefly numbers and catch adults. Ease off high-nitrogen fertilizer, because the soft, fast growth it produces is exactly what aphids feed on best. Let the ladybugs and lacewings do their job by not spraying anything broad-spectrum.
Sooty mold itself doesn't infect the plant. It just blocks light. Once you've stopped the insects, it weathers off. If you're dealing with a white powdery coating instead of a black film, that's a different problem entirely, covered in powdery mildew treatment.
Worked Example: Late August, Yellow Bottom Leaves With Brown Spots
Here's the diagnosis running start to finish on a real, typical case.
What you're looking at: it's August 24. Your two Better Boy plants are about 5 feet tall, staked, and carrying maybe a dozen ripening tomatoes each. The bottom 18 inches of both plants have gone yellow. Some of those yellow leaves have already dropped. You've been watering with a sprinkler in the evening because it's been hot.
Step 1: check the location. Yellowing is at the bottom only. Top growth is green. That's the "probably normal" pattern from section 1, but you don't stop there.
Step 2: pick up a yellow leaf and look at it in the light. There it is: three brown spots, each about a third of an inch, and inside each one you can see faint concentric rings. Around each spot the leaf tissue has gone bright yellow. That rules out normal aging. Normal senescence has no spots.
Step 3: rule out the lookalike. Septoria spots would be much smaller, about 1/8 inch, tan in the center with a dark edge, and there would be 30 or 40 of them on a single leaflet. You've got a handful of big ringed spots. That's early blight.
Step 4: check how far it's moved. You find one spotted leaf at 30 inches up the stem. It's climbing, but slowly.
Step 5: confirm the cause of the spread. Evening overhead sprinkler, bare soil under the plants, no mulch, lowest leaves resting on the ground. Every condition early blight needs.
Step 6: act. You remove and bag every spotted leaf plus everything below 12 inches, which comes to about 15 leaves per plant. You lay down 3 inches of straw. You switch to a hose at the soil line, in the morning, twice a week, deeply.
Step 7: decide about fungicide. It's late August. Your fruit is already sized up and ripening, and you have maybe five weeks left in the season. A protective fungicide now would only shield the leaves that are still clean, and the plant only needs to hold its remaining canopy long enough to finish the crop. You skip it, and instead make a note to mulch at planting time next spring and to buy an early-blight-tolerant variety like Mountain Magic or Defiant.
Outcome: the plants finish the season with a thinner canopy and slightly more sun exposure on the fruit. You lose nothing measurable. The real win is next year, because you now know the spores overwinter in that bed and you'll rotate and mulch from day one.
When Yellow Leaves Are Fine to Ignore
This deserves saying plainly, because a lot of gardening advice pushes you toward treatment you don't need.
A tomato plant in August or September, loaded with fruit, with yellow and dying lower leaves, is a normal tomato plant. It has finished the growth phase and is dumping resources into ripening. Perfect green foliage from soil to tip in late season is not a thing that happens outdoors.
Skip treatment when all of these are true:
- The plant is fruiting well and the fruit looks normal.
- New growth at the top is green and healthy.
- Yellowing is confined to the lowest third and is spreading slowly or not at all.
- It's past midsummer.
Spraying, feeding, or watering more in that situation does nothing good, and extra nitrogen this late actively hurts by pushing leafy growth instead of ripening.
Should You Remove Yellow Leaves?
Yes, but with limits.
Remove any leaf that's more than half yellow, any leaf with disease spots, and everything within 6 to 12 inches of the soil on an established plant. Those bottom leaves contribute almost nothing and act as a landing pad for soil-borne spores.
Leave leaves that are only slightly yellow at the tip and still mostly green. They're still producing sugar.
Never strip more than about a third of the canopy at once. Sudden heavy defoliation stresses the plant and exposes fruit to sunscald, which shows up as a pale, papery, sunken patch on the shoulder of the tomato.
Cut with clean snips, take the leaf back to the main stem, and work when the foliage is dry, because wet foliage spreads bacterial and fungal problems from cut to cut. Wipe your blades with alcohol between plants if you know one of them is diseased.
FAQ
Why are my tomato leaves turning yellow from the bottom up?
Bottom-up yellowing is the normal direction for both harmless causes and serious ones. If there are no spots and the plant is fruiting, it's age and nutrient movement. If the yellow leaves have brown ringed spots, it's early blight. If the whole plant is pale and stunted, it's nitrogen. Check a yellow leaf up close before deciding.
Do yellow tomato leaves turn green again?
Almost never. Chlorophyll doesn't come back to a leaf that's lost it, with the partial exception of a magnesium or iron problem caught very early. Judge whether a treatment worked by looking at the new growth over the following two weeks, not by watching old leaves.
Are yellow leaves on tomato plants a sign of overwatering or underwatering?
Both, which is why you check the soil rather than guess. Dig 3 inches down. Dry means underwatered, soggy means overwatered. A plant that stays wilted in the evening has a root problem in either direction, while one that wilts at midday and recovers by dark is fine.
Should I use Epsom salt on yellowing tomato leaves?
Only if a soil test shows low magnesium and the yellowing is interveinal on old leaves, with green veins in a net pattern. Epsom salt does nothing for early blight, nitrogen deficiency, overwatering, or blossom end rot, and routine use can push soil nutrients out of balance.
Why are my tomatoes turning yellow but the fruit looks fine?
That's the reassuring version. A plant that keeps setting and ripening normal fruit while dropping lower leaves is doing what tomatoes do late in the season. Watch the top third of the plant. As long as new growth stays green and fruit sizes up normally, no treatment is needed.
Can too much fertilizer turn tomato leaves yellow?
Yes. Over-fertilizing raises salt levels in the soil, which pulls water back out of roots and causes yellowing with dry, scorched leaf edges. Container plants are most at risk. Flush the pot with several times its volume of plain water and hold off feeding for two to three weeks.
What does nitrogen deficiency look like on tomatoes?
Uniform pale yellow-green over the whole plant, starting at the oldest bottom leaves, with no spots and visibly slowed growth. The stems often look thin and the plant is small for the date. Confirm the soil isn't waterlogged first, because drowned roots produce the identical look and feeding makes it worse.
Is it too late to save a tomato plant with yellow leaves?
It depends on what's causing it. Nutrient and watering problems fixed in July still give you a full harvest. Early blight can be slowed at any point by removing leaves and mulching. Fusarium and Verticillium wilt can't be saved at all, so pull those plants and put your effort into resistant varieties and rotation next season.
Updated August 2026