When to Harvest Potatoes

Dig new potatoes about 2 to 3 weeks after the plants flower, when the tubers are egg-sized and the skins are still thin enough to rub off with a thumb. Wait for storage potatoes until 2 to 3 weeks after the foliage has yellowed and died back, because that dead-vine period is when the skins toughen up and seal. Those two harvests happen on the same plant but they are completely different decisions, and mixing them up is why so many gardeners end up with a bin of potatoes that rots by Thanksgiving.
Your planting date and your first fall frost set the outside edges of the window. Check both with our free frost date lookup, then use the flowering and die-back signals below to pick the actual day.
The two potato harvests are two different decisions
A potato plant gives you two harvests, and they have almost nothing in common.
New potatoes are immature tubers pulled while the plant is still green and growing. They're small, thin-skinned, sweet, and they do not store. You eat them within a week or two and you accept that every one you take is a potato that never got to full size. This is a trade you make on purpose because young potatoes taste better than anything you can buy.
Storage potatoes are fully mature tubers lifted after the plant has finished its life. The vine has already pulled its sugars down into the tubers, the skins have set, and the potato is built to sit in the dark for months. This is the crop that feeds you in February.
The reason people get this wrong is that both harvests look the same in the moment. You dig, you get potatoes, you're happy. The difference only shows up eight weeks later when half the bin has gone soft. Immature tubers have skins that scuff off at the lightest handling, and every scuff is an open door for rot.
So before you touch a fork to the soil, answer one question: am I eating these this month, or storing them? Everything downstream follows from that.
How to know when potatoes are ready
There are three signals, and they matter in a specific order.
Signal 1: flowering (and why it lies sometimes)
Most potato varieties throw flowers roughly 7 to 9 weeks after planting. Flowering is the plant's public announcement that it has started setting tubers underground. Give it another 2 to 3 weeks after the first blooms open and you'll find new potatoes the size of a chicken egg down there.
Here's the limitation nobody mentions: flowering is unreliable as a signal because plenty of varieties barely flower at all. Some drop their buds before they open in hot weather. Yukon Gold and several russets are famously shy bloomers, and a stressed plant in a dry July may skip flowering entirely while still setting a fine crop.
If your plants haven't flowered and you're wondering when to pick potatoes, don't wait for blooms that may never come. Count days from planting instead, then do a test dig. Slide a hand into the loose soil at the edge of the hill, feel for a tuber, and pull one. It costs you one potato and tells you everything.
Signal 2: die-back
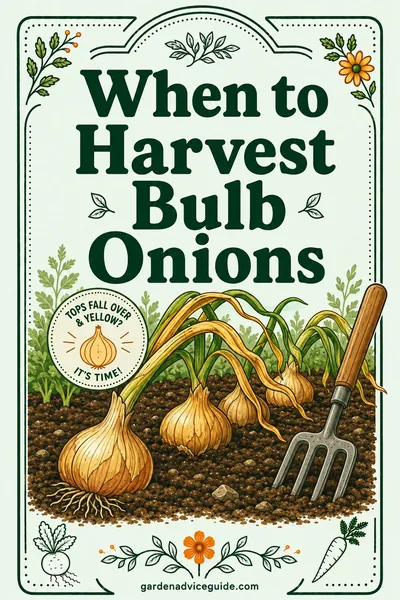
This is the real signal for storage potatoes. Late in the season the leaves yellow, then brown, then the whole vine collapses and dries. That's not disease and it's not neglect. It's the plant finishing.
Die-back means the tubers have stopped growing. They will not get bigger. What happens in the following two weeks is entirely about the skin.
Leave the potatoes in the ground for 2 to 3 weeks after the tops die. During that stretch the tuber lays down a thicker corky periderm, which is the layer that determines whether your potatoes last three weeks or six months. Colorado State University Extension puts this plainly in its potato guidance: allowing the vines to die and then leaving the tubers undisturbed for about two weeks lets the skins set for storage.
Signal 3: the thumb test for skin set
This is the only signal that actually confirms readiness, and it takes five seconds.
Dig one tuber. Rub it firmly with your thumb, the way you'd rub a smudge off a window. If the skin scrapes away and leaves a pale wet patch, the skin has not set and the potato needs more time in the ground. If the skin holds and only dirt comes off, you're ready to dig the bed.
Do this test on every planting before you commit, even when the calendar and the dead vines both say go. Soil conditions, variety, and a wet fall can all stretch the skin-set period out.
Days to maturity by potato type
Potato varieties are grouped by how long they take, and the group tells you what the potato is for. Seed potato tags almost always name the group or the day count, so check the bag when you buy.
| Potato type | Days to maturity | Harvest signal | Storage life |
|---|---|---|---|
| New potatoes (any variety) | 60-70 from planting | 2-3 weeks after flowering, tubers egg-sized | 1-2 weeks, refrigerate |
| First earlies | 70-90 | Flowering, then test dig; vines still green | 2-4 weeks |
| Second earlies | 95-110 | Vines start yellowing; light skin set | 2-3 months |
| Main crop / late season | 120-135 | Full die-back, then 2-3 weeks; skin passes thumb test | 5-9 months |
| Fingerlings | 90-110 | Vines yellowing, skins firm | 3-4 months |
A few things worth reading out of that table. First earlies are not storage potatoes no matter how carefully you cure them, so plan to eat them through summer. Main crop varieties are the only group that repays a root cellar. And fingerlings sit in the middle, which is why they're best treated as a fall-and-early-winter potato.
If you're planning next season around these numbers, our guide on when to plant potatoes works the same day counts backward from your last frost.
When to harvest potatoes for storage
Storage harvest is a process, not a day. Here's the sequence that gets you a bin that's still good in March.
Two to four weeks out: stop watering. Dry soil at the end of the season pushes the plant into finishing, firms up the skins, and makes digging day dramatically cleaner. Wet soil at harvest is the single biggest cause of storage rot.
When the vines have mostly died: start the clock. Two to three weeks from full die-back is your target. Mark it on a calendar, because "it looked about right" is how people lose crops.
If the vines won't die on their own, kill them. Some years, especially in a mild fall or with a heavily fed bed, the plants just keep going. Cut the foliage off at ground level with shears or a string trimmer, rake it away from the bed, then wait your two weeks. Cutting the tops forces skin set on your schedule instead of the weather's. Commercial growers do exactly this, and it works just as well over a 20-foot row.
Cutting the tops is also the move when late blight shows up in the patch. Remove and destroy the foliage right away so spores can't wash down into the soil onto the tubers, then wait the full two weeks before lifting.
Digging day: how to actually lift them
Pick a dry day, ideally after two or three days without rain, with dry soil and an overcast sky or a cool morning. Sun on freshly dug tubers starts greening within hours.
Start about 12 to 18 inches out from the base of the plant, not at the stem. Potatoes spread wider than people expect, and a fork through a tuber ruins it for storage. Push the fork in deep, lever the whole clump up, and then sort by hand rather than continuing to stab around.
Work the soil over twice. There are always stragglers, and a potato left in the ground overwinters, sprouts, and becomes a volunteer that carries disease into next year's crop.
Once they're up:
- Leave them on the soil surface for 1 to 2 hours to dry, in shade, not sun.
- Brush off loose dirt with your hand. Do not wash them.
- Sort as you go: any tuber with a fork wound, a soft spot, or green skin goes in the eat-soon pile, not the storage pile.
- Move them out of the light as soon as they're surface-dry.
Washing is the mistake I see most often. Water drives soil bacteria into the lenticels and softens the skin you just spent two weeks building. Wash potatoes the day you cook them, never the day you store them.
Curing: the step that doubles your storage life
Curing is a two-week rest that lets small wounds heal over before the potatoes go into cold storage.
Spread the tubers one or two deep in shallow crates, cardboard flats, or on newspaper. Put them somewhere dark at 45 to 60°F with high humidity, around 85 to 95 percent, and some air movement. A basement corner, an unheated garage in September, or a spare room with the blinds shut all work. Leave them 7 to 14 days.
What's happening in there is suberization: the potato grows a corky patch over every scuff and fork nick. A cured potato with a healed wound stores fine. An uncured one with the same wound goes soft in a month.
After curing, move them to their long-term spot: 40 to 45°F, dark, with humidity still high and air still moving. Milk crates, mesh bags, and slatted boxes all beat sealed plastic bins, which trap moisture and turn a good crop into a bad smell.
Two temperature rules are worth memorizing. Below about 40°F, potato starch converts to sugar and the potatoes turn sweet and fry up dark, which is why the refrigerator is the wrong place for them. Above about 50°F, they start sprouting early.
Never store potatoes with apples, and never in the light
Two storage mistakes will undo everything you did right.
Apples and other ripening fruit. Apples give off ethylene gas as they ripen. Ethylene in a closed space nudges potatoes out of dormancy, and you get a bin of sprouted, wrinkled tubers weeks ahead of schedule. Keep potatoes away from apples, pears, bananas, and tomatoes. Onions are a separate problem: they give off moisture, and the two crops stored together spoil each other faster than either would alone. Store your bulb onions in a different room, and the same goes for cured garlic, which wants warmer, drier conditions than potatoes do.
Light. Light triggers chlorophyll production in the tuber skin, which is the green you sometimes see on supermarket potatoes. The green itself is harmless, but it forms alongside solanine, a bitter glycoalkaloid the potato produces as a natural defense. Solanine causes nausea, cramping, and headaches at high enough doses, and cooking does not destroy it.
Treat green as a stop sign. If it's a small patch, cut it away generously along with any sprouts and eyes. If the potato is green through much of the flesh or tastes bitter, throw it out. A bitter bite is your last warning and it's worth listening to.
Prevention is easier than triage: dig in low light, cure in the dark, store in the dark, and hill your plants properly during the season so tubers never see daylight in the first place.
Worked example: seed potatoes planted April 15 in zone 6
Say you planted a mixed bed on April 15 in zone 6, half Red Norland (a first early, 70 days) and half Kennebec (main crop, 130 days). Here's the whole season on a calendar.
April 15: seed pieces go in, 4 inches deep.
May 1 to May 8: sprouts break the surface. Zone 6's last frost usually falls in late April to early May, so a late cold night here means hilling soil over the shoots or throwing a row cover on.
Mid-June (about day 60): the Norlands flower. Kennebecs may or may not, and it doesn't matter.
July 1 to July 8 (day 77 to 84): new potato window opens. Reach into the side of a Norland hill and pull egg-sized tubers, taking two or three per plant and leaving the rest to size up. These go in the fridge and get eaten within two weeks.
Mid to late July (day 90 to 100): Norland vines yellow. Lift the whole first-early bed once the tops are down. These will keep about a month in a cool basement, so they're the potatoes you cook through August.
Around August 23 (day 130): Kennebec vines yellow and collapse. Stop watering if you haven't already. If the vines are still stubbornly green by the end of August, cut them at ground level and start the clock manually.
September 5 to 8: thumb test one tuber. Skin holds, so dig the main crop on a dry morning. Zone 6's first fall frost is typically mid-October, which leaves a comfortable five-week buffer.
September 6 to 20: cure at 55°F in the dark, then move to 42°F storage. Those Kennebecs should carry you into February or March.
The bed is empty by mid-September, which is exactly when a fall planting can go in. Our guide on what to plant in September covers what fits that window in your zone.
Frost, freezes, and the end of the season
Light frost kills potato foliage and that's actually convenient. A frost that blackens the tops is doing the same job as your shears, so treat it as the start of your two-week skin-set countdown rather than an emergency.
The tubers themselves are insulated by soil and usually come through a light frost unharmed, especially if they're well hilled. Lift them within a couple of weeks though, because dead vines mean no more protection from the plant and a rotting canopy above wet soil is not a good neighbor.
A hard freeze is different. Once the ground itself starts freezing, tubers get damaged: frozen potatoes turn watery and blacken when they thaw, and they will not store. Get everything out before your soil freezes, which in most northern zones means digging by late October at the latest.
If a hard freeze is forecast and your vines died only a few days ago, dig anyway. Slightly under-set skins in the bin beat frozen tubers in the ground. Just move those potatoes to the eat-first pile and cure them a few extra days.
FAQ
When is harvest time for potatoes?
Harvest time depends on which crop you want. New potatoes come out 2 to 3 weeks after flowering, usually 60 to 70 days after planting. Storage potatoes come out 2 to 3 weeks after the foliage dies back, which is 90 days for first earlies and 120 to 135 days for main crop varieties.
When should I pull potatoes if the plants never flowered?
Skip the flowering signal entirely and count days from planting instead, then confirm with a test dig. Plenty of varieties bloom weakly or not at all, especially in a hot or dry summer, and it has no bearing on the crop underground. Pull one tuber, check the size, and let that decide.
How do I know when potatoes are ready without digging up the whole bed?
Do a single test dig at the edge of one hill. Slide your hand or a trowel into the loose soil about 8 inches out from the stem, pull one tuber, and check its size and skin. One potato tells you what the whole row is doing, and the plant carries on fine.
Can I leave potatoes in the ground over winter?
Not in most of the country. Tubers left in cold wet soil rot, and any that survive sprout as volunteers that carry disease and pests into next season. In frost-free zones 9 and 10 you can leave them a few extra weeks, but soil pests and sprouting still make lifting the better call.
Why did my potatoes turn green, and can I eat them?
Green means the tuber was exposed to light, either through thin soil during the season or on a bright counter afterward. The green comes with solanine, which is bitter and can cause stomach upset, and cooking doesn't remove it. Cut away small green patches generously, and discard any potato that's green throughout or tastes bitter.
When do I dig potatoes if rain is in the forecast?
Dig before the rain if the skins have set, even a few days early. Harvesting into saturated soil coats the tubers in mud you can't brush off, and that trapped moisture is the leading cause of storage rot. If you get caught by rain, wait two or three dry days before lifting.
Do I have to cure potatoes if I'm eating them soon?
No. Potatoes you'll use within two or three weeks can go straight to a cool dark cupboard once they're surface-dry. Curing is purely a storage step, so it only matters for the main crop you intend to keep past November.
How long do harvested potatoes last in storage?
Properly cured main crop potatoes held at 40 to 45°F in the dark with good humidity keep 5 to 9 months. First earlies last 2 to 4 weeks regardless of how you treat them, and second earlies fall between at 2 to 3 months. Damaged, washed, or uncured tubers are the ones that fail first, so sort carefully on digging day.
Updated August 2026