Best Outdoor Compost Bin for Beginners

For most beginners, the best outdoor compost bin is an enclosed plastic bin holding around 80 gallons, set directly on soil in a spot you walk past every day. If you have a big yard with lots of leaves and no close neighbors, a 3 by 3 by 3 foot wire hoop bin beats it on every measure except looks, because it is the smallest size that will actually heat up.
Pick the bin around two things: how much material you generate in a week, and whether rodents or neighbors are a factor. Everything else is a preference.
Composting to fill beds? Work out how much finished material you actually need with our free raised bed soil calculator, which converts bed dimensions into cubic feet so you know whether one bin is enough or you need two.
Updated September 2026
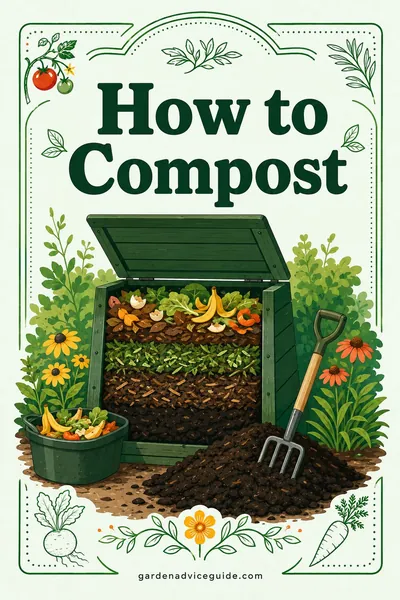
A quick note before the comparisons. The bin does not make compost. Carbon, nitrogen, air, and water make compost, and the bin is just a container that keeps the pile tidy and holds heat. A perfect bin filled wrong produces a slimy mess. A wire cylinder filled right produces beautiful black crumb. If you have not read the underlying method yet, how to compost covers the browns to greens ratio and the troubleshooting, and this page covers the hardware.
Best outdoor compost bin for beginners: match the bin to your yard
Start with the constraint that rules you out of options, not with the bin you like the look of.
| Your situation | Best choice | Why |
|---|---|---|
| Small yard, kitchen scraps only, neighbors close | Enclosed plastic bin, 60 to 90 gallons | Contained, tidy, no turning required |
| Big yard, lots of leaves and clippings | 3x3x3 ft wire hoop or pallet bin | Only real option at volume, and it heats |
| Serious rodent pressure | Enclosed bin with a lid and hardware cloth floor, or a tumbler | Off the ground and sealed |
| Want finished compost in weeks, not a year | Dual-chamber tumbler plus a stockpile of browns | Easy to turn, but small |
| Physical limits on lifting and turning | Tumbler, or a stationary bin you never turn | A crank beats a fork |
| HOA or a visible yard | Enclosed bin, dark color, behind a shrub | Looks like a rain barrel from the street |
| Want the cheapest workable setup | Wire hoop from hardware cloth, or four pallets | Almost nothing to buy |
| Apartment or no outdoor space at all | Worm bin indoors, or a curbside program | An outdoor bin is not the answer here |
The four bin types worth considering
Enclosed stationary bin
The black plastic cone or square with a lid and a small door at the bottom. This is the bin most municipalities hand out, usually in the 60 to 90 gallon range.
Good: tidy, animal-resistant with the lid on, holds moisture in dry climates, invisible from the street once you tuck it behind something. You add material at the top and eventually pull finished compost from the bottom door.
Bad: small, hard to turn, and that bottom door is a hassle in practice because the finished layer is under everything you added since. Most people give up on the door, lift the whole bin off the pile once a year, and shovel it.
Best for: kitchen scraps plus modest yard trimmings, on a normal suburban lot.
Wire hoop or hardware cloth cylinder
A cylinder of welded wire fencing or half inch hardware cloth held with a few zip ties, sitting on bare soil.
Good: cheap, huge airflow, expands to any size you want, and lifting the hoop off the pile gives you a completely open pile to fork back into an empty hoop next to it. That single trick makes turning easier than in any other bin.
Bad: looks like exactly what it is, dries out fast in wind, and offers zero animal resistance.
Best for: leaves, garden waste, and anyone with room to put it out of sight.
Pallet bin
Three or four wooden shipping pallets stood on edge and wired at the corners, usually built as a two or three bay row.
Good: big, sturdy, free if you can source pallets, and the multi-bay design solves the fundamental composting problem, which is that you keep adding fresh material to a pile that is trying to finish. Bay one is active, bay two is curing, bay three holds stockpiled browns.
Bad: takes real space, needs a Saturday to build, and pallets rot out in about five years.
Best for: large gardens and anyone who generates yard waste by the wheelbarrow.
Tumbler
A drum on a frame with a crank or hand holds, usually with two chambers.
Good: genuinely easy to turn, sealed against animals, off the ground, and clean enough for a patio.
Bad: small. A single chamber on a dual-chamber tumbler often holds under 40 gallons, and a chamber that size will almost never reach true hot composting temperatures because it cannot hold its own heat. Tumblers also get heavy and hard to spin when full and wet.
Best for: small households, small yards, people who cannot manage a fork, and anyone who wants the tidiest possible setup and accepts slower, cooler compost.
| Bin type | Typical capacity | Effort | Speed | Animal resistance | Looks |
|---|---|---|---|---|---|
| Enclosed plastic bin | 60 to 90 gal | Low | Slow to medium | Good with lid on | Fine |
| Wire hoop | 100 to 250 gal | Medium | Medium to fast | Poor | Poor |
| Pallet bin, 3 bay | 400 gal plus | High | Fast | Poor | Rustic |
| Dual-chamber tumbler | 2 chambers, 27 to 40 gal each | Low | Medium | Excellent | Good |
| In-ground digester | Buried, kitchen scraps only | Very low | Slow | Excellent | Invisible |
| Open pile, no bin | Anything | Medium | Medium | Poor | Poor |
The size question, answered with numbers
Size is the single decision that most affects your results, and it is the one beginners get wrong.
A pile heats because the microbes inside generate more heat than the surface can shed. That only works when the pile has enough volume relative to its surface area. The threshold is about 3 feet in every direction, which is 27 cubic feet, or roughly 202 gallons.
Below that, you can still make excellent compost. It just happens cold and slow, over six to twelve months, driven by fungi, worms, and time rather than heat. Cold compost is perfectly good compost. It simply will not kill weed seeds or pathogens, so keep those out.
Some useful conversions:
| Volume | Cubic feet | Gallons | Rough dimensions |
|---|---|---|---|
| Minimum hot pile | 27 | 202 | 3 x 3 x 3 ft |
| Typical enclosed bin | 10 to 12 | 75 to 90 | 30 in wide, 34 in tall |
| One tumbler chamber | 4 to 5 | 30 to 40 | Half a small drum |
| Large pallet bay | 48 | 360 | 4 x 4 x 3 ft |
| Finished compost from a full 3 ft bin | 8 to 12 | 60 to 90 | Shrinks 60 to 70 percent |
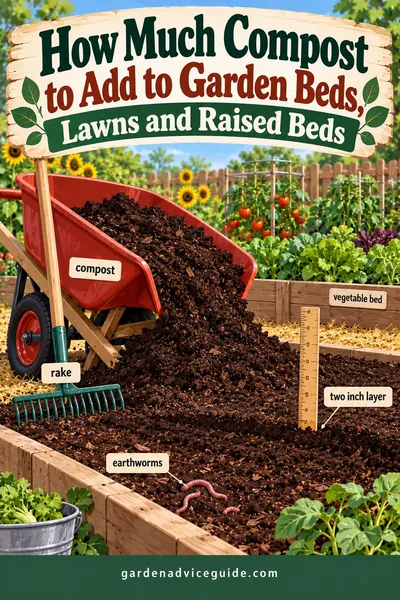
That last row is the one nobody warns you about. A packed 3 foot cube of leaves and scraps reduces to about a third of its starting volume by the time it is finished. If you need 12 cubic feet of compost for a raised bed, you need to start with three or four times that in raw material. Our guide to how much compost to add to a garden sets out the target depths so you know what the bin has to produce.
Worked example: sizing a bin for a four person household
Here is how to do the math for your own house instead of guessing.
Step 1, measure your greens for two weeks. Keep kitchen scraps in a container with known volume. Say you fill a 1 gallon pail each week. That is 1 gallon of greens weekly, about 52 gallons a year.
Step 2, calculate the browns you need. The ratio is 2 to 3 parts browns to 1 part greens by volume. At 1 gallon of scraps a week, you need 2 to 3 gallons of dry leaves, shredded cardboard, or straw to go with it. Call it 3 gallons of browns.
Step 3, add them up. 1 gallon greens plus 3 gallons browns is 4 gallons of new material a week, or about 17 gallons a month before any decomposition.
Step 4, apply shrinkage. Material loses roughly half its volume in the first month as it collapses and water leaves. So a bin gains far less than 17 gallons of standing volume per month in practice, closer to 8 to 10.
Step 5, pick the bin. An 80 gallon enclosed bin absorbs that pace for roughly eight months before it is genuinely full, which lines up neatly with an annual harvest cycle: fill from March to November, let it sit over winter, empty in spring.
Step 6, add the yard waste correction. Now suppose you also rake leaves and mow. One fall's leaves from a modest lot will overwhelm an 80 gallon bin by themselves. Two options: run a wire hoop just for leaves alongside the enclosed bin, or shred the leaves with a mower and stockpile them in bags next to the bin, feeding them in through the year as your brown supply. The second option is what experienced composters actually do, because it solves the winter brown shortage at the same time.
Where to put it
Placement causes more abandoned compost bins than any other factor. A bin at the back of the property is a bin you stop walking to in February.
- On bare soil, not concrete. Soil contact lets worms, fungi, and soil bacteria colonize the pile from below, and it lets excess water drain. If your only spot is a hard surface, put down 4 inches of soil or finished compost first.
- Level ground. A tumbler on a slope racks its frame. A hoop on a slope leaches out the low side.
- Part shade is ideal. Full sun dries a pile out, deep shade under a conifer keeps it cold and soggy. The east side of a fence or the north side of a shed works well.
- Within reach of a hose. You will need to water the pile. If watering means hauling a bucket 80 feet, you will not do it.
- Close to the kitchen door, or at least on a path you walk anyway. This matters more than any other placement rule.
- A few feet clear on at least one side so you can get a fork or a wheelbarrow in.
- Not directly against a wooden fence or the house. A wet pile against wood rots it, and you want air on all sides.
- Not under a downspout or in the spot where water pools. A drowned pile goes anaerobic and smells.
Rodent-proofing, without giving up composting
Rodents are attracted by food, not by compost. Manage the food and the problem mostly disappears.
- Never add meat, fish, dairy, bones, or greasy food. This is the single biggest factor.
- Bury fresh scraps in the center of the pile, under 6 inches of browns, rather than dropping them on top.
- Keep a lid on an enclosed bin, and keep the bottom door closed.
- Line the base with half inch hardware cloth if you have known rat pressure. Quarter inch is better. Cut a circle a few inches wider than the bin and set the bin on top of it.
- Keep the pile damp. Rodents nest in dry, fluffy piles and avoid wet, hot ones.
- Turn it occasionally. Regular disturbance discourages nesting more than almost anything else.
A tumbler is the strongest option here because it is off the ground and fully sealed, at the cost of capacity.
What to buy, in order of what actually matters
If you are standing in the aisle deciding, rank the features this way.
- Volume. Bigger works better, always. The most common regret is a bin that is too small.
- Access to the finished compost. Can you get a shovel in, or lift the bin off the pile? A bin you cannot empty is a storage container.
- A real lid. Keeps rain out in wet climates, moisture in during dry ones, and animals out everywhere.
- Airflow. Slots, mesh sides, or a wire cage. A sealed plastic drum with three small holes goes anaerobic.
- Two chambers or two bins. The finish-while-you-fill problem is the biggest structural flaw in single-bin composting.
- Looks. Last. It matters only insofar as an ugly bin gets banished to a corner you never visit.
The mistakes that sink beginner setups
Too small. A 20 gallon bin cannot make meaningful compost for a household. It fills in a month and then you have nowhere to put anything.
No brown supply. Greens are easy to find and browns are not, especially February through June. Bag leaves every fall and stack them beside the bin. This one habit fixes most beginner compost problems.
Bin on concrete with no soil layer. No worms, no drainage, slow everything.
Buying a tumbler expecting hot compost. Small chambers lose heat too fast. Buy one for convenience and cleanliness, not speed.
Filling it and then adding to it forever. A pile that gets fresh scraps every week never finishes, because the newest material is always at the start of the process. Either use two bins, or stop adding at some point and let the pile cure.
Letting it dry out. A pile should feel like a wrung-out sponge. In summer, that often means adding water every week or two.
Once you have finished compost, it goes further as a topdressing than as a soil replacement. Our mulch guide covers depth by material, no dig gardening explains the layer-on-top approach that uses compost most efficiently, and fall garden cleanup tells you which garden debris belongs in the bin and which absolutely does not.
Frequently asked questions
How big should a compost bin be for a beginner?
Aim for at least 60 to 90 gallons if you are composting kitchen scraps, and a full 3 by 3 by 3 foot bin, about 202 gallons, if you want the pile to heat up. Smaller bins still work, they just compost cold and slowly, taking six to twelve months instead of a few.
Is a compost tumbler better than a bin?
A tumbler is easier to turn, cleaner, and animal-proof, but the chambers are usually too small to reach hot composting temperatures. A stationary bin or wire hoop holds much more material and heats better. Pick the tumbler for convenience, the bin or hoop for output.
Do I need a bin at all, or can I just make a pile?
An open pile works fine and is what most farms use. A bin only adds tidiness, moisture retention, and some animal resistance. If you have space out of sight and no rodent concerns, a bare pile with a tarp over it composts just as well as anything you can buy.
Should a compost bin sit on soil or concrete?
Soil, whenever possible. Direct soil contact lets worms and soil microbes move into the pile and lets excess water drain away. On a patio or driveway, put down at least 4 inches of soil or finished compost under the bin first.
Can I compost in winter?
Yes, though it slows to nearly a stop in cold zones. Keep adding scraps through winter, bury them under browns, and the pile will restart on its own as soil warms in spring. A larger pile holds heat far longer into the cold than a small one.
How do I keep a compost bin from smelling?
A healthy pile smells like forest floor. A sour or ammonia smell means too many greens and not enough air, so add a few buckets of dry browns and turn it. A rotten egg smell means the pile is waterlogged, so fork it open and add coarse material to restore airflow.
How long until I get usable compost?
A well managed hot pile in a 3 foot bin can finish in about two to three months in warm weather. A cold pile in an enclosed bin, fed weekly and never turned, takes six to twelve months. In both cases, finished compost is dark, crumbly, smells earthy, and no longer contains recognizable pieces of what you put in.