Planning a Garden Layout

Start with sun, not with plants. Walk your yard and mark where it gets 6 or more hours of direct summer sun, because that patch is your garden whether it's where you pictured it or not. Then orient your rows or beds so the tall crops sit along the north side, where they won't shade everything behind them.
Almost every disappointing first garden traces back to skipping that step and starting with a seed catalog instead. Plants are the last decision, not the first.
Before you commit to bed sizes, check how many plants actually fit with our free plant spacing calculator so you're planning around real numbers instead of hopeful ones.
Planning a Garden Layout in Order of Decisions
There's a right order to these choices, because each one narrows the next. Work through them in this sequence and you won't have to redo anything.
- Sun. Non-negotiable and unchangeable. Find it first.
- Water access. Determines whether you'll actually keep up in July.
- Orientation. Tall crops north, short crops south.
- Bed style. In-ground rows, raised beds, square foot, or containers.
- Bed dimensions and paths. Reach and access.
- Spacing within beds. Airflow and yield.
- Grouping. By water need and by season.
- Rotation. Where each family goes next year and the year after.
- Perennials. Placed outside the rotation area entirely.
The first two are about your property. The rest are about the garden. Get one and two wrong and nothing downstream saves you.
Step 1: Sun Mapping, and How to Actually Do It
"Full sun" on a seed packet means 6 to 8 hours of direct summer sun. University of Maryland Extension puts the working minimum for fruiting vegetables at 6 hours, with 8 or more producing noticeably better tomatoes, peppers, squash and melons. Our page on full sun vs partial sun vs partial shade puts hour counts on the other tag categories and explains why morning sun and afternoon sun are not worth the same.
You cannot eyeball this. Shade moves, and a spot that looks bright at 10 am can be under a maple by 2 pm.
The one-day method. Pick a clear day, ideally in late spring or summer when trees are leafed out. Every two hours from 8 am to 6 pm, step outside and sketch or photograph which parts of the yard are in direct sun. Five or six checks is plenty.
Then count. A spot in sun at 8, 10, 12, 2 and 4 has roughly 8+ hours. A spot in sun only at 12 and 2 has about 4, which is a leafy greens and herbs area, not a tomato bed.
Shortcuts if you don't want to wait a day:
- A phone sun-path app will show you the summer arc for your exact coordinates.
- Watch where snow melts first in late winter. That's your sun.
- Note which side of the house you're on. In the northern hemisphere, south-facing gets the most, north-facing the least, east gets gentle morning sun, west gets harsh afternoon sun.
Important: map in summer, or account for it. A bed that's blazing in March can be fully shaded in July once the oaks fill in. If you're planning in winter, look up and imagine the canopy.
What to do with less than 6 hours. Don't force it. Under 6 hours, skip the fruiting crops and grow what actually works: lettuce, spinach, arugula, kale, chard, mustard, most herbs, radishes, bush beans at the edge. A shaded salad bed that produces beats a shaded tomato bed that doesn't.
Step 2: Water Access
This is the decision people skip and regret. A garden 80 feet from the nearest spigot is a garden you'll neglect in the exact week it needs you most.
Practical rules:
- Stay within one hose length, meaning about 50 to 75 feet from a spigot.
- A hose bib splitter plus an inexpensive timer turns a chore into an automatic system. This matters most for raised beds and containers, which dry fastest.
- Downhill of a downspout is usually a bad location. Standing water kills more vegetables than drought does.
- Rain barrel elevation: a barrel needs to be raised 18 inches or more to get any usable gravity flow to a soaker hose.
If your best sun and your best water access are in different places, sun wins. Run more hose.
Step 3: The North-Side-Tall-Crops Rule
Put tall crops on the north edge of the garden, shorter crops in the middle, and lowest crops at the south edge.
The reason is simple. In the continental US, the summer sun tracks across the southern sky. Anything tall casts its shadow to the north. A 6-foot trellis of pole beans on the south side of your plot puts everything behind it in shade by mid-morning. That same trellis on the north side shades nothing but the fence.
Height tiers to plan around:
| Tier | Position | Crops |
|---|---|---|
| Tall, 5 to 8 ft | North edge | Pole beans, indeterminate tomatoes, trellised cucumbers, corn, sunflowers |
| Medium, 2 to 4 ft | Middle | Peppers, eggplant, determinate tomatoes, bush beans, broccoli, cabbage |
| Low, under 18 in | South edge | Lettuce, spinach, carrots, radish, onions, beets, herbs, strawberries |
Row direction. For in-ground rows, running them north to south gives both sides of each row an even share of sun through the day. It's a small effect compared to the height tiers, but it's free.
The useful exception. In hot southern climates, deliberate afternoon shade from a tall crop is a feature, not a bug. Lettuce planted on the east side of a corn block or a bean trellis will keep producing weeks longer into summer than lettuce in the open.
Step 4: Bed Style Comparison
Four common approaches, and they suit genuinely different situations.
| Bed style | What it costs to start | Drainage | Soil control | Accessibility | Best use |
|---|---|---|---|---|---|
| In-ground rows | Lowest by far. Amendments only, or nothing at all | Depends on native soil | Low, you amend what you have | Ground-level, bending | Large plots, decent existing soil, sprawling crops |
| Raised beds, framed | Highest per square foot. Lumber, hardware, and enough bought soil to fill the box | Excellent | Total, you fill it | Better, 12 to 24 in high | Poor or rocky soil, wet sites, tidy small gardens |
| Square foot | Same as raised beds, plus a grid you can make from scrap | Excellent | Total | Same as raised | Small spaces, beginners, intensive salad and herb growing |
| Containers | Cheap per pot, but it adds up fast once you want a dozen | Excellent with holes | Total | Best, can be at any height | Patios, balconies, renters, adding a few plants anywhere |
In-ground rows are the cheapest way to grow a lot of food. They work if your native soil drains reasonably and isn't full of rock or construction fill. Downside: you're fighting your existing soil for years, and everything happens at ground level.
Raised beds solve bad soil in one move because you fill them with what you choose. They warm up 1 to 2 weeks earlier in spring, drain fast, and stay out of foot traffic so they don't compact. Downsides: real upfront cost, and they dry out faster than in-ground beds, which means more watering in summer.
Square foot gardening is a planting method inside a raised bed. You grid the surface into 1-foot squares and plant a set number per square: 1 tomato per square (really per 4 squares), 4 lettuce, 9 spinach, 16 radish or carrots. It's excellent for beginners because it removes spacing guesswork, and it produces a lot of salad from very little space. It's weaker for big sprawling crops.
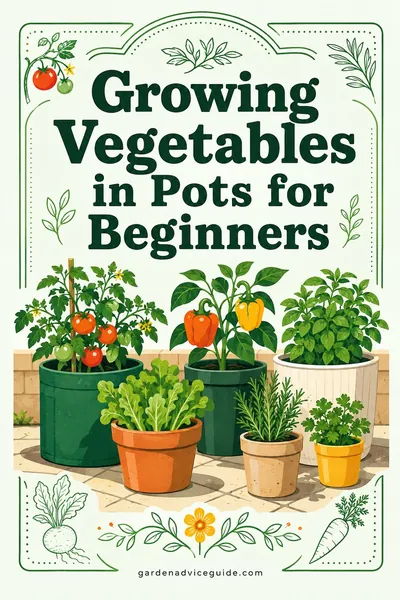
Containers aren't a lesser option, they're the right option when you don't have ground. They also let you put a plant exactly where the sun is. See growing vegetables in pots for beginners for pot sizes and mix.
Mixing styles is normal and often best: raised beds for salad and roots, in-ground for squash and corn that want to sprawl, containers for herbs by the kitchen door.
Step 5: Bed Dimensions That Actually Work
These numbers come from reach and from wheelbarrows, and ignoring them makes a garden unpleasant to use.
Width: 4 feet maximum. Most adults can comfortably reach about 2 feet into a bed. A 4-foot bed is reachable from both sides, so you never step in it. A 5-foot bed has a strip down the middle you can't tend without stepping into the soil, which compacts it. If a bed is against a wall or fence and only accessible from one side, cap it at 30 inches wide.
Length: whatever fits, 8 to 12 feet is the sweet spot. Longer beds tempt you to walk through them instead of around, so break long runs with a cross path every 12 to 16 feet.
Paths: 18 to 24 inches minimum between beds. That's enough to kneel and work. If you'll be pushing a wheelbarrow or a garden cart, make at least the main path 30 to 36 inches. This is the single most common regret in a first raised bed build, because narrow paths can't be widened later without moving the beds.
Height and depth by crop:
| Crop group | Minimum soil depth | Notes |
|---|---|---|
| Lettuce, spinach, arugula, herbs | 6 to 8 in | Shallow rooted, fine in low beds |
| Bush beans, peppers, broccoli, onions | 10 to 12 in | Comfortable at 12 |
| Tomatoes, eggplant, squash | 12 to 18 in | 12 is the working minimum |
| Carrots, parsnips, potatoes | 12 to 18 in | Depth determines root length and shape |
A bed sitting on open soil counts the native soil below it, so a 6-inch frame over decent ground can grow carrots. A bed on concrete, gravel or landscape fabric over hardpan has only its own depth, so build it to the full requirement.
Accessibility height. A 24 to 30 inch tall bed can be worked standing or from a seated position. It costs more to fill, but for anyone with knee, back or mobility issues, it's the difference between gardening and not.
Raised Garden Bed for Tomatoes: Depth, Count and Setup
Tomatoes get their own section because they're what most people build a bed for, and because the plant count question has an answer nobody likes.
Depth: 12 inches minimum, 18 is better. Tomatoes root deep when they're allowed to. A 12-inch bed over native soil is plenty. A 12-inch bed on a hard surface is workable but you'll water more.
How many tomatoes fit in a 4x8 raised bed? Four. Not eight.
Here's the math. A 4x8 bed is 32 square feet. Indeterminate tomatoes need 24 to 36 inches between plants for airflow and light. At 24-inch spacing in two rows, you could technically cram in eight. At that density, by mid-July the canopy is a solid mass, the interior leaves never dry, and you get early blight and Septoria running through the whole bed. You also get smaller fruit, because eight plants in 32 square feet are competing for the same water and nutrients four would have had to themselves.
The honest layout: four indeterminate plants in a single row down the center at 24 inches apart, staked or caged, with the outer 12 inches on each side planted to basil, lettuce or onions. Four healthy indeterminate plants outproduce eight crowded ones, and they're far less work.
If you want six, use determinate or compact varieties at 18 to 24 inches, which stay shorter and denser but finish earlier.
Other tomato bed specifics:
- Put the tomato row on the north side of a mixed bed, or run it north to south if the bed is tomatoes only.
- Install supports at planting, not in July. Driving a stake next to an established plant tears roots.
- Leave 18 inches between the outermost plant and any solid fence so air moves behind the plants.
- Don't plant tomatoes in the same bed two years running. More on that below.
Step 6: Spacing, and What Crowding Actually Costs
Crowding is the most common self-inflicted garden problem, and it doesn't show up until the plants are big enough that fixing it means pulling healthy plants.
What you lose when plants are too close:
- Airflow. Leaves that stay wet for hours are how powdery mildew, early blight and Septoria establish. This is the big one. See powdery mildew treatment for what that looks like on squash and cucumbers, and tomato blight for the tomato version.
- Light. Shaded lower leaves stop contributing and start dropping.
- Root competition. Two crowded plants split one plant's worth of water and nutrients.
- Access. You can't harvest, prune or scout for pests in a thicket, so problems get found late.
Working spacings for common crops:
| Crop | In-row spacing | Row spacing | Square foot equivalent |
|---|---|---|---|
| Tomato, indeterminate | 24 to 36 in | 36 to 48 in | 1 per 4 squares |
| Tomato, determinate | 18 to 24 in | 30 to 36 in | 1 per 2 squares |
| Pepper, eggplant | 18 in | 24 to 30 in | 1 per square |
| Bush bean | 4 to 6 in | 18 to 24 in | 9 per square |
| Pole bean | 6 in | Trellis | 8 per square at a trellis |
| Cucumber, trellised | 12 in | Trellis | 2 per square |
| Summer squash | 24 to 36 in | 36 to 48 in | 1 per 9 squares |
| Lettuce, head | 10 to 12 in | 12 in | 4 per square |
| Carrot | 2 to 3 in | 12 in | 16 per square |
| Onion | 4 to 6 in | 12 in | 9 per square |
| Broccoli, cabbage | 18 in | 24 in | 1 per square |
Run your own bed dimensions through the plant spacing calculator rather than estimating, especially for a first build.
Thin ruthlessly. Direct-sown carrots, beets and lettuce come up thick, and thinning feels wasteful. Ten well-spaced carrots beat forty tangled pencil-thin ones.
Step 7: Grouping by Water Need and by Season
Two grouping habits make maintenance dramatically easier.
Group by water need. Thirsty crops together, drought-tolerant crops together. Tomatoes, cucumbers, squash, celery and lettuce want steady moisture. Established herbs like rosemary, thyme, oregano and sage want to dry between waterings, and rot if they're on a tomato schedule. Putting them in one bed forces you to compromise both.
Group by season so you can clear a whole bed at once. This is the trick that makes succession planting practical. Put the spring crops that finish in June, peas, spinach, radishes, early lettuce, in one bed. When they're done, that entire bed comes out in one afternoon and gets replanted with beans, fall brassicas or a cover crop. If those same spring crops are scattered across four beds, you're left with awkward gaps you never fill.
A simple seasonal grouping:
- Bed A, spring then fall: peas, spinach, radish, lettuce, then fall brassicas and greens
- Bed B, full summer: tomatoes, peppers, basil, held all season
- Bed C, summer then fall: early bush beans and cucumbers, then garlic in October
- Bed D, long season roots: carrots, beets, onions, mostly one and done
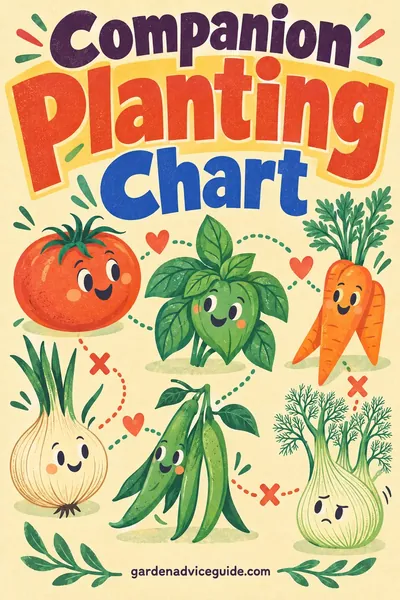
Timing for your specific area comes from our planting calendar by zone, and which crops sit well together is in the companion planting chart.
Step 8: Crop Rotation by Plant Family
Rotation means not growing the same plant family in the same spot year after year. Soil-borne diseases and family-specific pests build up when you do, and different families draw on the soil differently.
The families that matter:
| Family | Crops | Rotation note |
|---|---|---|
| Nightshades | Tomato, pepper, eggplant, potato | Highest priority to rotate. Blight and verticillium persist in soil |
| Brassicas | Cabbage, broccoli, kale, cauliflower, radish, turnip, arugula | Clubroot persists for years. Heavy nitrogen users |
| Cucurbits | Cucumber, squash, zucchini, melon, pumpkin | Squash bugs and vine borers overwinter in place |
| Legumes | Beans, peas | Fix nitrogen, so they improve the bed for what follows |
| Alliums | Onion, garlic, leek, shallot | Low disease pressure, easy to slot anywhere |
| Roots and umbels | Carrot, parsnip, celery, parsley, dill | Light feeders, good after heavy feeders |
| Greens and chenopods | Lettuce, spinach, beet, chard | Flexible, useful as filler in any bed |
A simple 4-year rotation across four beds, moving everything one bed clockwise each year:
| Year | Bed 1 | Bed 2 | Bed 3 | Bed 4 |
|---|---|---|---|---|
| 2026 | Nightshades | Legumes | Brassicas | Roots and alliums |
| 2027 | Roots and alliums | Nightshades | Legumes | Brassicas |
| 2028 | Brassicas | Roots and alliums | Nightshades | Legumes |
| 2029 | Legumes | Brassicas | Roots and alliums | Nightshades |
That order isn't random. Legumes leave nitrogen behind, so heavy-feeding brassicas follow them. Light-feeding roots follow the brassicas. Then nightshades get a bed that's had three years off from nightshade disease.
If you only have three beds, run the same idea on a 3-year cycle: nightshades, then legumes and brassicas, then roots and alliums. Three years is enough to matter. Even two is better than none.
Write it down. A rotation plan you're reconstructing from memory in April is a rotation plan that doesn't exist. A note on your phone or a sketch taped inside the shed door is enough.
Step 9: Put Perennials Outside the Rotation
Perennials stay put for years, so they cannot live in a bed you plan to rotate. Give them their own permanent area, usually along an edge or at one end of the garden.
- Asparagus: 15 to 20 productive years, needs 12 to 18 inches between crowns and full sun. Site it once and leave it.
- Rhubarb: large plants, 3 to 4 feet apart, and they get big. Tolerates part shade.
- Berries: raspberries spread aggressively by runners, so give them a dedicated row with a mowed strip or a root barrier around it. Blueberries need acidic soil, pH 4.5 to 5.5, which is different enough from vegetable soil that they belong in their own bed or large containers.
- Perennial herbs: rosemary, thyme, sage, oregano, chives, mint. Put mint in a container, always, or it takes the bed.
- Strawberries: technically a short-lived perennial, replanted every 3 to 4 years. Their own bed makes renovating them easy.
- Grapes: a permanent vine that wants a fence, arbor or wire run of its own, and the type has to match your winter. Check the grape growing zone before you site one, because moving an established vine is not realistic.
Place perennials on the north or east edge where their permanence and eventual size won't shade the annual beds, and where the mower and the tiller won't reach them.
Worked Layout 1: A 4x8 Raised Bed
A single 4x8 bed, 12 inches deep, full sun, first-year garden. That's 32 square feet, and it can feed a couple through the season if you plan it.
Fill volume: 4 ft x 8 ft x 1 ft = 32 cubic feet, which is about 1.2 cubic yards. In bagged terms, that's roughly 16 bags of 2 cubic foot mix. Buying bulk soil is far cheaper above about 1 cubic yard.
Layout, north side at the top:
| Zone | Position | Planting | Count |
|---|---|---|---|
| North strip, 12 in | Back edge | Indeterminate tomatoes, staked, 24 in apart | 4 |
| Middle strip, 18 in | Center | Peppers, 18 in apart | 4 |
| South strip, 18 in | Front edge | Lettuce (spring), then bush beans (summer) | 12 lettuce, then 24 beans |
| Corners and gaps | Throughout | Basil between peppers, chives at the ends | 4 basil, 2 chives |
Season plan:
- April: lettuce, spinach and radish across the whole bed while it's empty
- Mid-May, after last frost: clear the front two thirds, plant tomatoes and peppers, tuck basil between
- Late June: pull the last spring greens, direct sow bush beans in the front strip
- September: pull the beans, sow spinach and arugula for fall
- October: clear the tomatoes, plant garlic in the north strip for next July
That single bed produces salad in spring, roughly 40 to 60 pounds of tomatoes across four plants in a good year, peppers, two bean pickings and a fall greens crop. It takes about 20 minutes a week outside of peak harvest.
Worked Layout 2: A 20x20 In-Ground Plot
400 square feet, which is a serious garden and a serious commitment. Do not start here.
Structure: five beds, each 4 ft x 20 ft, running north to south, with four 30-inch paths between them. That's 5 x 4 = 20 feet of bed plus paths, so trim beds to 3.5 feet wide to fit paths inside the 20-foot span, or push the outer edges out slightly.
Bed assignments, west to east:
| Bed | Crop group | Contents | Rough plant count |
|---|---|---|---|
| 1 | Nightshades | Tomatoes at 30 in, peppers at 18 in | 8 tomatoes, 12 peppers |
| 2 | Cucurbits | Trellised cucumbers, summer squash, one winter squash at the end | 8 cucumber, 4 squash, 2 winter squash |
| 3 | Legumes | Pole beans on a north-end trellis, bush beans in succession | 20 pole, 40 bush |
| 4 | Brassicas | Broccoli, cabbage, kale at 18 in | 30 plants total |
| 5 | Roots and alliums | Carrots, beets, onions, garlic | 100+ carrots, 60 onions, 50 garlic |
Tall crop placement: the pole bean trellis and the corn block, if you grow one, go at the north end of their beds so their shadow falls on the path and the fence, not on bed 4.
Perennial strip: a 3-foot band along the north fence, outside the five beds, for asparagus, rhubarb and a few raspberry canes.
Season plan:
- March/April: peas on the bean trellis, spinach and radish in bed 5, onions transplanted
- May: nightshades and cucurbits go in after last frost
- June: peas come out, pole beans go on the same trellis
- July: garlic harvested from bed 5, fall brassica seedlings started
- August: clear spent bush beans and squash, sow fall carrots and greens
- October: garlic planted for next year, cover crop of winter rye on any empty ground
- Next spring: everything shifts one bed east on the rotation
Time cost, honestly: 400 square feet runs about 3 to 5 hours a week from May through August, more during harvest and preserving weeks. That's the number that decides whether this garden survives to September.
Start Smaller Than You Want To
The most useful advice in this entire article: a 4x8 bed you tend well beats a 20x20 plot you abandon in July.
First gardens fail from scale, not from skill. In April everything feels manageable. By mid-July there are weeds, squash bugs, a heat wave, a vacation, and 400 square feet of obligation. Most people walk away, and they walk away believing they're bad at gardening when they were only overcommitted.
A sane progression:
- Year 1: one 4x8 bed, or four to six containers. Learn your sun, your soil, your watering rhythm and your actual free time.
- Year 2: add a second bed. Try one new crop family.
- Year 3: expand to whatever year two proved you could handle.
You can always add a bed. Reclaiming an overgrown plot in August is a much worse afternoon.
FAQ
How do I plan a garden layout for beginners?
Map your sun over one day, pick the spot with 6 or more hours, and build one 4x8 raised bed there. Put tall crops on the north side, keep the bed 4 feet wide so you can reach the middle, and leave paths at least 18 inches. Plant five or six crops you'll genuinely eat, not fifteen you're curious about.
What is the best vegetable garden layout?
Whichever one matches your sun, your soil and your available time. Raised beds suit poor or rocky soil and small spaces. In-ground rows suit large plots with decent existing soil. What every good layout shares: tall crops north, beds no wider than 4 feet, paths you can kneel in, and a rotation plan.
How wide should a garden bed be?
Four feet maximum when you can reach it from both sides, and 30 inches maximum when it's against a wall or fence. The limit comes from arm reach, roughly 2 feet. A wider bed means stepping into the soil, and compacted soil undoes the main advantage of a raised bed.
How many tomatoes can I plant in a 4x8 raised bed?
Four indeterminate plants at 24-inch spacing in a single center row. You can physically fit eight, but the canopy closes, airflow dies, and disease follows. Four well-spaced plants produce more total fruit than eight crowded ones and take less work.
How deep should a raised garden bed be?
Six to 8 inches for greens and herbs, 12 inches for tomatoes, peppers, squash and root crops, and 18 inches if the bed sits on concrete, gravel or hard-packed fill with no usable soil below. A bed over decent native ground can be shallower because roots keep going down through the bottom.
How wide should garden paths be?
Eighteen to 24 inches between beds is the minimum for kneeling and working. Make at least one main path 30 to 36 inches if you'll use a wheelbarrow or garden cart. Narrow paths are the most common regret in a first raised bed build, and they can't be widened later without moving beds.
Do I really need to rotate crops in a small garden?
Yes, and it matters most for nightshades and brassicas, whose soil diseases persist for years. Even a 2 or 3 year rotation across a few beds helps considerably. If you truly have only one bed, at minimum move the tomatoes to the other end of it each year and refresh the top few inches of soil.
Should garden rows run north to south or east to west?
North to south, so both sides of each row get an even share of sun through the day. It's a modest gain compared to putting tall crops on the north edge, which matters far more. If your site's shape forces east-west rows, run them that way and just keep the height tiers right.
Related reading: companion planting chart · planting calendar by zone · growing vegetables in pots for beginners · powdery mildew treatment
Updated August 2026
A note on numbers. This page gives you timing, quantities and spacing, not dollar figures. Seed, plant and material pricing varies by region, by supplier and by season, and we do not set any of it. Work out what you need here, then price the list at two or three local suppliers.