How to Grow Potatoes

Plant certified seed potatoes 2 to 4 weeks before your last frost, once the soil reaches 45 to 50F, setting the pieces 4 inches deep and 12 inches apart in loose soil at pH 5.0 to 6.0. Hill soil up around the stems twice during the season, because the tubers form above the seed piece along the buried stem, not below it. Water steadily at 1 to 2 inches a week once flowering starts, dig new potatoes at flowering, and lift the main crop 2 to 3 weeks after the vines die back.
Almost every disappointing potato harvest traces back to one of two mistakes: planting a grocery store potato, or never hilling. Both are easy to fix, and both cost you most of the crop when you get them wrong.
Not sure of your window? Find your planting dates with our free When-to-Plant Lookup before you order seed.
When to Plant Potatoes by Zone
Potatoes are a cool-season crop. The plant makes tubers best when soil sits between 60 and 70F, and it stops making them almost entirely above 80F. That means you want the crop growing during the cool half of your season, which in the North is spring into summer and in the South is late winter or fall.
| Zone | Average last frost | Plant seed potatoes | New potatoes ready | Main crop harvest |
|---|---|---|---|---|
| 3 | Late May | Mid to late May | Early to mid July | Late August to early September |
| 4 | Mid May | Early to mid May | Early July | Late August |
| 5 | Early May | Mid to late April | Late June | Mid to late August |
| 6 | Mid April | Late March to early April | Mid June | Early to mid August |
| 7 | Early April | Mid to late March | Early June | Late July |
| 8 | Mid March | Late February to early March | Mid May | Late June, plus a fall crop from an August planting |
| 9 | Mid February | Late January to February | Mid April | Late May, plus a fall crop from a September planting |
| 10 | No reliable frost | October through January | March | April, grown as a winter crop |
Read these dates as regional averages, not promises. Frost tables and USDA zone maps are built from 30-year weather station averages spread across a wide area, and your own yard can run 1 to 2 weeks off in either direction. Elevation moves it the most, so a garden at 600 feet and one at 2,400 feet in the same county are not on the same calendar. A cold-air drainage pocket at the bottom of a slope, a south-facing wall, a large body of water, or a lot of nearby pavement all shift the real date. Your county extension office publishes local data and knows those pockets, and asking costs nothing. Compare your station numbers in our frost dates tool, confirm your zone in the growing zones lookup, and check the official USDA Plant Hardiness Zone Map if you have moved recently, since the 2023 revision shifted many areas half a zone warmer.
Potato foliage is frost tender even though the seed piece underground is not. A hard freeze after emergence blackens the tops, and the plant usually regrows from the tuber, but it costs you 2 weeks. If a frost is forecast on emerged plants, pull soil over them or throw a row cover on. Our guide on when to plant potatoes works through the soil temperature rule and the fall planting math in more detail.
Seed Potatoes vs Grocery Store Potatoes
This is the first real decision, and it matters more than variety choice.
Certified seed potatoes are grown under inspection specifically for planting. They are tested for the diseases that ruin potato crops and follow the grower's plants around for years: late blight, potato virus Y, blackleg, ring rot, and scab. The certification tag is the whole point, and it is what you are paying for.
Grocery store potatoes carry two separate problems.
- Sprout inhibitors. Most supermarket potatoes are treated after harvest with chlorpropham or a similar sprout suppressant so they hold on the shelf for months. That treatment does exactly what it says. Planted potatoes may sprout late, weakly, or not at all, and you often will not know which until 4 weeks of your season have gone by. Organic supermarket potatoes are usually untreated, which is why they sometimes work.
- No disease screening. A grocery potato can carry blight spores or a virus with no visible sign. Plant it and you have introduced that pathogen into your soil, where several of these organisms persist for years and affect tomatoes, peppers, and eggplants too.
The math is simple. Two pounds of certified seed plants a 10-foot row and returns 20 to 40 pounds, so the seed costs a small fraction of what the row gives back. Risking the crop and the soil to save the price of a couple of pounds of potatoes is a bad trade.
Can you save your own seed? In a home garden, yes, for a couple of seasons, if the plants were healthy. Keep the smallest sound tubers, roughly egg-sized, from your best plants and store them cool and dark. After 2 or 3 generations, virus builds up invisibly and yields drop, so buy fresh certified stock again.
Picking a variety
| Type | Days to maturity | Best use | Storage life | Examples |
|---|---|---|---|---|
| First early | 60 to 75 | New potatoes, boiling | Weeks, eat fresh | Irish Cobbler, Red Norland, Caribe |
| Second early | 75 to 90 | Boiling, salads | 1 to 2 months | Yukon Gold, Red Pontiac, Chieftain |
| Main crop | 90 to 120 | Baking, frying, storage | 4 to 8 months | Kennebec, Russet Burbank, German Butterball |
| Fingerling | 90 to 110 | Roasting | 3 to 5 months | Russian Banana, French Fingerling |
Short season and a cool climate favor earlies. If you want potatoes in the basement in January, you need a main crop variety, because earlies simply will not hold.
Chitting: Sprouting Seed Potatoes Before You Plant
Chitting means pre-sprouting the seed potatoes in light before they go in the ground. It buys 1 to 3 weeks of season, which matters in short-summer zones and matters again in the South, where you are racing summer heat.
How to do it:
- Start 3 to 4 weeks before planting date. Earlier just makes long fragile sprouts.
- Set the potatoes eye end up in an egg carton, a seed tray, or a shallow box. The eye end is the one with the most dimples. The other end has the scar where it attached to the plant.
- Keep them at 50 to 60F in bright indirect light. Light is the key. Sprouts grown in the dark come out long, white, and brittle, and they snap off during planting. Sprouts grown in light come out short, thick, green-purple, and tough.
- Plant when sprouts are 0.5 to 1 inch long. Longer than an inch and handling gets difficult.
- Handle gently. Each broken sprout is a stem you will not get.
Chitting is optional for main crop potatoes in zones 7 and warmer, where the season is long enough that you gain little. It is genuinely worth doing for earlies everywhere and for everything in zones 3 through 5.
Cutting and Curing Seed Pieces
Small seed potatoes, under about 2 ounces or roughly egg size, go in whole. Bigger ones get cut, and cutting them correctly is the difference between a stand of strong plants and a row of rotted gaps.
How to cut:
- Aim for pieces of 1.5 to 2 ounces, about the size of a large walnut, each with at least 2 eyes. Three eyes is fine. One eye is a gamble.
- Cut with a clean sharp knife. Wipe the blade with rubbing alcohol between potatoes so you are not moving disease from one to the next.
- Cut lengthwise through the potato so each piece gets eyes from both the top and the middle, rather than slicing off the eye-heavy top as one piece.
- Pieces smaller than an ounce produce weak plants. Pieces bigger than 3 ounces are wasted seed with no yield gain.
How to cure the cut pieces:
Spread them in a single layer somewhere with air movement at 60 to 70F and moderate humidity for 2 to 3 days, until the cut faces feel dry and leathery and look slightly tan. That skin over the wound is called suberin, and it is the plant's own barrier against soil bacteria and fungi.
Planting a fresh-cut piece into cold wet soil is the classic route to seed piece rot, which shows up as a row with random missing plants and no obvious explanation. Cure first and that problem mostly disappears.
Some gardeners dust cut faces with agricultural sulfur, which lowers surface pH and suppresses rot. It is optional and only worth it if you plant into heavy, slow-draining ground.
Soil, Sun, and Spacing
Potatoes want full sun, at least 6 hours and ideally 8. Less sun gives you tall thin vines and small tubers.
Soil:
- Loose and deep. Tubers expand by pushing soil aside, so compacted ground produces small knobby potatoes. Work the top 10 to 12 inches until it crumbles.
- pH 5.0 to 6.0, which is more acidic than almost anything else in the garden. This is deliberate. Common scab, the corky brown patches on potato skin, is suppressed below about pH 5.5 and thrives above 6.0. Do not lime a potato bed.
- Well drained. Potatoes sitting in saturated soil rot. Raised rows or raised beds solve heavy clay.
- No fresh manure. It raises scab risk sharply and pushes leafy growth. Composted manure from the previous fall is fine.
- Test before you amend. Our guide on how to test garden soil covers the pH reading that decides whether you need sulfur, and the raised bed soil calculator works out how much mix a new bed takes.
Spacing:
| Growing method | In-row spacing | Between rows | Planting depth |
|---|---|---|---|
| Earlies, in ground | 10 to 12 in | 24 to 30 in | 4 in |
| Main crop, in ground | 12 to 15 in | 30 to 36 in | 4 to 5 in |
| Raised bed | 12 in | 18 to 24 in | 4 in |
| Grow bag or container | 1 plant per 5 gallons | n/a | 4 to 6 in above bag bottom fill |
Tight spacing gives you more, smaller potatoes. Wide spacing gives you fewer, larger ones. If you want bakers, use the wide end of the range. Our plant spacing calculator turns bed dimensions into plant counts.
Worked example. A 4x8 foot raised bed is 32 square feet. Planting at 12 inches in the row with 18 inches between rows gives you 8 plants per 8-foot row and 3 rows across the 4-foot width, so 24 plants. At 2-ounce seed pieces that is 3 pounds of seed potatoes. A healthy plant returns 5 to 10 pounds in good soil, so expect 120 to 240 pounds from that bed, with 150 pounds a fair working number. Water need is 1 to 2 inches per week, and 1 inch over 32 square feet is 20 gallons, so budget 20 to 40 gallons weekly during tuber bulking. You will also need roughly 6 cubic feet of extra soil or compost on hand for hilling, which is about 3 bags of garden soil.
Hilling Potatoes: Where the Tubers Actually Form
This is the concept most people miss, and it is the single biggest lever on your yield.
Potato tubers do not grow from the roots, and they do not grow below the seed piece. They form on short underground stems called stolons that push out sideways from the buried portion of the main stem, above the seed piece. The rule follows directly: the more stem you bury, the more stolon zone you create, and the more potatoes the plant can set.
That is what hilling does. It is not weed control and it is not about stability. It is about manufacturing more underground stem.
The second job is just as important. Any tuber that reaches daylight turns green, and green potatoes are not safe to eat. More on that below. Hilling keeps the crop covered.
How to hill, step by step:
- First hill when plants are 6 to 8 inches tall. Pull loose soil, compost, or straw from between the rows up around the stems, burying the bottom 3 to 4 inches of each plant. Leave the top 3 or 4 inches of leaves showing.
- Second hill 2 to 3 weeks later, when another 6 to 8 inches of growth has happened. Add another 3 to 4 inches, so the finished hill stands 6 to 8 inches above the original soil line and about 12 inches wide at the base.
- A third hill is optional for main crop varieties with a long season, or any time you can see a tuber shoulder poking out.
- Stop hilling once flowering starts. By then the stolons are set and the plant is filling tubers rather than making new ones.
- Work when the soil is dry and crumbly. Wet soil packs into a brick.
- Do not damage the stems. Use your hands or a hoe pulled gently. Broken stems do not regrow.
Substitutes for soil: clean straw, chopped leaves, or aged compost all work and are lighter to move. Straw hilling makes harvest easy, since you pull the straw back and the potatoes are sitting right there. It dries faster than soil, so watch moisture, and it can shelter voles.
How much difference does it make? Skipping hilling on a variety that would otherwise return 8 pounds a plant typically drops you to 3 or 4, plus you lose some of what you do get to greening. On a 24-plant bed that is the difference between roughly 150 pounds and roughly 80.
One caveat worth knowing: some determinate early varieties set tubers in a single tight cluster near the seed piece and gain less from aggressive hilling than indeterminate main crop types do. Hill anyway. Even for those varieties, the protection from greening pays for itself.
Green Potatoes and Solanine
A potato that has turned green is not safe to eat. This is not a quality issue or an old wives' tale.
Light exposure triggers two separate reactions in a tuber. One makes chlorophyll, which is the green you see and is itself harmless. The other, running at the same time, raises levels of solanine and chaconine, glycoalkaloids that the plant produces as a defense. Chlorophyll is simply the visible marker for a process you cannot see.
Solanine causes nausea, vomiting, stomach cramps, headache, and in severe cases neurological symptoms. It tastes bitter and it burns slightly at the back of the throat. Cooking does not destroy it. Boiling, baking, and frying all leave it essentially intact, because it is heat stable up to about 340F.
What to do:
- Slight green on part of the skin: peel deeply, at least a quarter inch below the green, and cut away any green in the flesh. The concentration is highest just under the skin.
- Green throughout, or green under the skin: throw it out. Not worth it.
- Any potato that tastes bitter: stop eating it, whatever the color.
- Sprouted potatoes in storage: the sprouts and the area around the eyes are high in solanine. Cut them out generously. A potato that is firm with a few sprouts removed is fine, and a soft shriveled one is not.
Prevention comes down to three habits: hill well so no tuber sees light in the garden, dig carefully and cover any tuber you expose if you are not lifting the whole plant, and store in complete darkness, since a potato left on a sunny windowsill greens in a few days. Grocery store potatoes under fluorescent lighting green too, which is why you sometimes buy one.
Watering Potatoes
Potatoes want 1 to 2 inches of water a week, and the timing matters as much as the amount.
- From planting to emergence: keep the soil just moist. Overwatering here rots seed pieces.
- From emergence to flowering: steady moisture. The plant is building the vine that will feed the tubers.
- From flowering through bulking: this is the critical window. Tubers are sizing up, and this is when consistent water pays. Aim for the top 8 to 10 inches staying evenly moist. Check by digging a finger in at 3 inches.
- Last 2 to 3 weeks before harvest: taper off, then stop entirely once the vines yellow. Dry soil at the end firms the skins and cuts storage rot sharply.
Uneven watering is what causes hollow heart and knobby, misshapen tubers. A dry spell stalls growth, the tuber sets a firmer layer, then heavy water restarts growth and the tuber cracks or grows a second lobe. A soaker hose on a schedule fixes more potato problems than any spray. Our watering guide tool converts inches per week into run time for your setup.
Mulch 2 to 3 inches deep over the hill holds moisture and keeps the root zone cooler, which matters because tuber formation slows badly above 80F soil.
Feeding Potatoes
Potatoes are moderately hungry and they want the nutrition front-loaded, with the emphasis shifting away from nitrogen once flowering begins.
- At planting: work in a balanced fertilizer such as 10-10-10 at about 1.5 pounds per 100 square feet, or a generous layer of finished compost, in the trench below the seed pieces. Keep granular fertilizer from touching the seed directly.
- At first hilling: a light side dressing of the same, roughly half the planting rate.
- After flowering: stop nitrogen. Excess nitrogen late gives you a spectacular green vine and small tubers, the same trap gardeners fall into with green beans and tomatoes.
- Potassium matters more than most people think. It drives starch filling. Wood ash is high in potassium but also raises pH, which invites scab, so use a sulfate of potash instead in a potato bed.
Do not plant potatoes where tomatoes, peppers, eggplants, or potatoes grew in the last 3 years. They share the same disease list, and rotation is the cheapest control you have. Our companion planting chart shows what pairs well nearby, and beans are a good neighbor while sunflowers are not.
Common Potato Problems
| What you see | Likely cause | What to do |
|---|---|---|
| Corky brown rough patches on skin | Common scab | Keep pH below 5.5, no fresh manure, keep soil moist during tuber set, use resistant varieties |
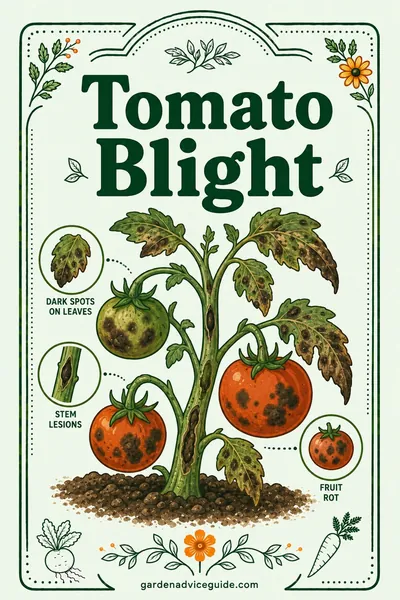
| Dark greasy blotches on leaves, white fuzz underneath in damp weather | Late blight | Remove and bag affected plants immediately, never compost, plant certified seed, space for airflow |
| Brown target-shaped rings on lower leaves | Early blight | Mulch to block soil splash, rotate crops, remove lower leaves |
| Striped orange-and-black beetles, orange egg clusters under leaves | Colorado potato beetle | Hand pick daily into soapy water, crush egg clusters, use straw mulch and floating row cover until flowering |
| Tiny leaves curled and yellow, sticky residue | Aphids, which also spread virus | See how to get rid of aphids |
| Yellow tops far too early, small crop | Virus from uncertified seed, or heat | Buy certified seed next season, plant earlier |
| Hollow brown cavity in the center of a big tuber | Hollow heart from uneven water and fast growth | Steady watering, avoid oversized spacing on big varieties |
| Green shoulders on tubers | Light exposure from thin hilling | Hill higher, cover exposed tubers immediately |
| Wet slimy rot at harvest | Bacterial soft rot from waterlogged soil | Improve drainage, cure properly, do not wash before storage |
| Tunnels and holes bored through tubers | Wireworms | Avoid planting after sod, trap with buried carrot pieces |
| Powdery white coating on leaves | Powdery mildew | See powdery mildew treatment |
Colorado potato beetle is the pest that genuinely wipes out home crops. Check the undersides of leaves twice a week from emergence. Ten minutes of hand picking at the right moment beats any spray.
Harvest Signs: New Potatoes and Main Crop
There are two harvests from the same plant, and they answer different questions.
New potatoes are immature tubers with thin, delicate skin. They are ready roughly 2 to 3 weeks after flowering starts, which for most varieties is 60 to 75 days from planting. The signal is the flowers themselves. Reach into the side of the hill with your hand, feel for tubers the size of a golf ball or larger, and take a few from each plant without pulling the whole thing. The plant keeps growing.
New potatoes do not store. The skin has not set, so they bruise and shrivel within a week or two. Eat them within days, which is the whole appeal.
Main crop potatoes are ready when the vines yellow, flop over, and die back on their own, usually 90 to 120 days from planting. Then comes the step everyone skips:
Wait 2 to 3 weeks after the vines die before you dig. During that period the skins set, going from thin and rubbable to firm and papery. A potato with a set skin stores for months. One dug the day the vine collapsed stores for weeks.
Test it by rubbing a tuber with your thumb. If the skin scuffs off, wait. If it stays put, dig.
Digging technique:
- Choose a dry day with dry soil.
- Start your fork 12 to 15 inches out from the stem, not right at it, and lift from underneath. Tubers spread wider than you expect.
- Work through the loosened soil by hand.
- Do not wash them. The soil coating protects the skin. Brush off the loose dirt and leave it at that.
- Set damaged tubers aside in a separate pile and eat those first. They will not store.
If frost is coming before the vines die naturally, cut the tops off at ground level, then leave the tubers in the ground for 2 weeks to set skins before digging. Our when to harvest potatoes guide has the day-count math per variety type, and the when to harvest tool covers the rest of the garden.
How to Grow Potatoes in Containers and Grow Bags
Container potatoes work well and solve two real problems: soil-borne disease, and heavy clay you have not fixed yet. They also make hilling straightforward, since you add mix rather than move it.
Container size:
- Minimum 5 gallons per plant. A 10-gallon grow bag holds 2 plants, a 15-gallon holds 3.
- Depth 16 inches or more. Width helps too, but depth is what gives you hilling room.
- Drainage holes are non-negotiable. Potatoes rot in standing water faster than most crops.
- Fabric grow bags beat plastic pots. They drain better, air-prune the roots, and roll down for the fill-as-you-go method.
The fill-as-you-go method:
- Fill the bottom 4 to 6 inches with a mix of potting soil and compost. Roll the sides of a fabric bag down to that level so the plant gets light.
- Set 1 or 2 seed pieces per 5 gallons, sprouts up, and cover with 3 inches of mix.
- When shoots reach 6 to 8 inches, add mix to bury the lower half of the stems and unroll the bag sides.
- Repeat every 2 to 3 weeks until the container is filled to within 2 inches of the rim.
- Stop adding once the plant flowers.
Container-specific care:
- Water more often. Containers dry fast, and in July a 10-gallon bag may need water daily. Uneven container watering is the top cause of small container potatoes.
- Feed every 2 weeks with a half-strength liquid feed after the first month, since frequent watering leaches nutrients out.
- Use potting mix, not garden soil, which compacts into a solid block in a pot.
- Expect 2 to 5 pounds per plant, less than in-ground. The trade is convenience and clean harvest.
- Harvest by tipping the whole bag onto a tarp. No fork, no cut tubers.
Earlies and fingerlings suit containers best because they finish before midsummer heat cooks the container. A dark grow bag in full afternoon sun can run 15 degrees above soil temperature, which stops tuber formation. Move it into afternoon shade in July, or set it where a taller crop shades it.
Curing and Storing Potatoes
Curing after harvest is what turns a good crop into a winter's worth of food.
Curing: hold the potatoes at 50 to 60F with high humidity, around 85 to 95 percent, in complete darkness, for 10 to 14 days. A garage corner, a basement, or a cardboard box in a cool room all work. Curing thickens the skin and heals small nicks and scrapes.
Storage after curing:
- 35 to 40F, dark, humid, and ventilated. A root cellar, an unheated basement, or a cool garage that stays above freezing.
- Do not refrigerate. Below about 40F the starch converts to sugar, which makes the potato taste sweet and turn dark brown when fried. Bring a chilled potato back to room temperature for a week and much of that reverses.
- Do not wash before storing. Wash right before cooking.
- Do not store with apples or onions. Apples give off ethylene, which triggers sprouting, and onions release moisture that speeds potato rot.
- Use a paper bag, a burlap sack, a slatted crate, or a cardboard box. Never a sealed plastic bag, which traps moisture and rots the lot.
- Check monthly and pull anything soft. One rotting potato spreads fast through a crate.
Expected storage life is 4 to 8 months for main crop varieties, 1 to 2 months for second earlies, and a few weeks for earlies and any damaged tubers.
Do not save your storage potatoes as next year's seed automatically. Storage potatoes held warm may sprout early or carry disease picked up during the season. Keep specifically selected, healthy, egg-sized tubers separate if you plan to replant, and buy certified seed again every 2 or 3 years.
FAQ
Can you plant potatoes from the grocery store?
You can, but it often fails and it is not worth the risk. Most supermarket potatoes are treated with a sprout inhibitor that makes them sprout late, weakly, or not at all, and none of them are screened for the diseases that persist in soil for years and also hit tomatoes and peppers. Certified seed potatoes are cheap by the pound, and 2 pounds plants a 10-foot row that returns 20 to 40 pounds.
How deep should you plant potatoes?
Set seed pieces 4 inches deep, or 4 to 5 inches for main crop varieties in light soil. Deeper is not better, because a piece planted 8 inches down in cold spring soil is slow to emerge and more likely to rot. The extra depth you want comes from hilling later, once the plant is actively growing and can turn buried stem into more tubers.
Why do you hill potatoes?
Tubers form on stems above the seed piece, so burying more stem gives the plant more places to set potatoes. Hilling also keeps developing tubers covered, and any tuber that gets light turns green and unsafe to eat. Hill first when plants are 6 to 8 inches tall, again 2 to 3 weeks later, and stop once flowering begins.
Are green potatoes safe to eat?
No. Green skin signals raised levels of solanine and chaconine, natural toxins that cause nausea, cramps, and headache, and cooking does not destroy them. If only part of the skin is green, peel a quarter inch deep and cut all green away. If the flesh is green or the potato tastes bitter, throw it out.
When should I dig up my potatoes?
Dig new potatoes 2 to 3 weeks after flowering starts, taking a few from the side of each hill by hand. For the main crop, wait until the vines yellow and die back, then wait another 2 to 3 weeks before digging so the skins set. Rub a tuber with your thumb: if the skin scuffs off, give it more time.
How many potatoes does one plant produce?
Five to 10 pounds per plant in good loose soil with proper hilling and steady water, and 2 to 5 pounds in a container. A single 2-ounce seed piece returning 8 pounds is a 60-fold multiplication, which is why potatoes are one of the highest-calorie-per-square-foot crops a home garden can grow. Poor hilling typically cuts that in half.
Do potatoes need full sun?
Yes, at least 6 hours and preferably 8. The tubers are the plant's stored sugar, and that sugar comes from the leaves, so shaded plants make tall thin vines and small potatoes. The one place shade helps is the soil itself in midsummer, since tuber formation slows sharply above 80F soil, which is what mulch and hilling are quietly doing for you.
Can you grow potatoes in the same spot every year?
No. Rotate on a 3-year cycle and keep potatoes away from beds that recently held tomatoes, peppers, or eggplants, since all four share early blight, late blight, and verticillium wilt. Soil-borne disease builds year over year in a repeated bed, and rotation is the cheapest control available. Containers with fresh mix sidestep the problem entirely.
Updated August 2026
A note on numbers. This page gives you timing, quantities and spacing, not dollar figures. Seed, plant and material pricing varies by region, by supplier and by season, and we do not set any of it. Work out what you need here, then price the list at two or three local suppliers.