How to Test Garden Soil (And Which Tests Are Worth Your Money)

Send a sample to your county extension lab. It's cheap, and it's the only test that gives you actual nutrient levels plus a lime or fertilizer recommendation in pounds for your specific soil, which is the part that changes what you do next. Home kits and probe meters tell you far less than most people assume, and one of them tells you almost nothing at all.
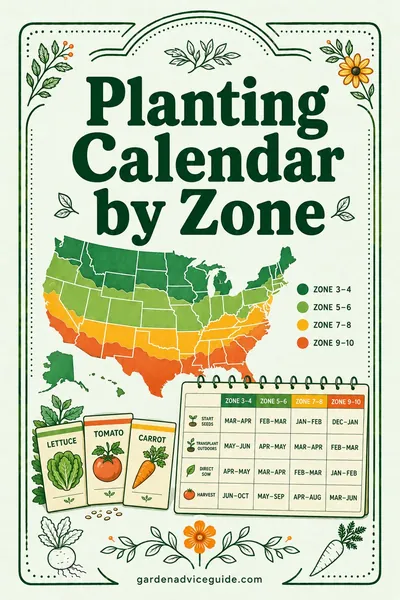
Planning the season around what you find? Our free planting calendar gives you the sowing and planting dates for your zone, so a fall soil test lands exactly when the amendments have time to work.
Updated August 2026
A note on numbers. This page gives you pH targets, sampling depths, core counts and timing, not dollar figures. Lab fees are set by your state extension service, and kits, meters and amendments are priced by your supplier and your region, so we do not publish any of it. Work out what your soil needs here, then check the current fee on your own extension site.
Here's the problem this solves. You've been feeding a bed all season, the plants still look hungry, and you have no idea whether you're short on potassium, sitting at pH 5.4, or just watering wrong. Guessing costs you a season. One cheap test ends the guessing in two weeks.
How to Test Garden Soil: The Whole Process in Seven Steps
The test itself is simple. Sampling is where people get it wrong, so read the sampling section below before you grab a trowel.
- Call or search your county extension office for the soil testing lab that serves your state. Nearly every land-grant university runs one. Penn State Extension and the UMass Amherst Soil and Plant Nutrient Testing Laboratory are two of the best known, and several states run free or reduced-cost programs for residents.
- Download the submission form and pick the right test. The standard garden test is usually all you need. Add the optional lead screen if you're growing food near an old house, a demolished structure, or a busy road.
- Decide how many samples you're sending. One per area you manage differently. The vegetable plot, the lawn, and the blueberry bed are three separate tests, not one.
- Take 10 to 15 cores from across each area and mix them into one composite sample.
- Air dry the mix on newspaper or a paper plate for a day or two, indoors, out of the sun.
- Send about 1 to 2 cups in the lab's bag with the form and payment. Turnaround is usually one to three weeks.
- Read the recommendation section first, then work backward through the numbers. That's covered further down.
Why a Lab Test Beats Everything Else
A lab isn't just doing a fancier version of your drugstore kit. It runs a chemical extraction that mimics what plant roots can actually pull out of your soil, then it compares the result to decades of local field trials on soils like yours.
That last part is the real product. A number without a local calibration is trivia. A recommendation that says "apply 42 pounds of ground limestone to this plot this fall" is an instruction you can act on.
You get, on one page:
- Soil pH and buffer pH
- Phosphorus, potassium, calcium, magnesium, and usually sulfur and micronutrients
- Organic matter percentage
- Cation exchange capacity (CEC)
- Lime requirement in pounds per 1,000 square feet
- Fertilizer recommendations for the crop you named on the form
No home kit produces the last two, and those are the two that tell you what to buy.
The Honest Truth About Home Soil Test Kits
Home tests aren't scams. They're just measuring less than the packaging implies, and each one has a narrow job it does well.
Probe-style pH meters (the two-prong metal ones, and the cheapest thing on the shelf) are the weakest of the group. They don't run an actual pH measurement. They read electrical conductivity between two dissimilar metals and convert that to a pH-ish number, which means the reading moves with soil moisture, soil temperature, salt content, and how clean the prongs are. Push one into damp soil and it drifts toward the middle of its scale, which is why so many of them read "6.8 to 7.0, neutral" in soil that a lab later calls 5.6. Consumer testing groups and extension educators have flagged this repeatedly. If you own one, use it to compare two spots in the same garden on the same day, not to decide whether to lime.
Chemical color-change kits (capsule-and-vial types, sold in packs of around 40 tests) are genuinely better than meters for pH. They use a real indicator dye, and if you follow the instructions with distilled water, you'll usually land within about half a pH point. That's enough to tell 5.5 from 6.5. Their nutrient tests are the weak half: they use a general-purpose extractant rather than the one calibrated for your region's soil chemistry, and they report vague bands like "depleted / adequate / surplus" with no rate attached. Knowing potassium is "adequate" doesn't tell you whether to add any.
Digital "smart" soil sensors with an app are usually the same conductivity trick in nicer packaging. Some are decent moisture meters. Treat the pH and NPK numbers as decoration.
The vinegar and baking soda test is free and mostly misunderstood. Put a spoonful of dry soil in a cup and add vinegar: fizzing means free carbonates, so your soil is alkaline, generally above about 7.5. Put another spoonful in a cup, wet it into a slurry, and add baking soda: fizzing means strongly acidic, generally below about 5. Here's the catch. Most garden soil doesn't fizz either way, and that "no reaction" result covers everything from 5.2 to 7.4. The entire range where your actual decisions live, 6.0 to 7.0, comes back blank. It's a good screen for "is my soil weird?" and useless for "how much lime?"
| Test type | Relative cost | What it measures | Reliability | Best for |
|---|---|---|---|---|
| Extension lab test | Cheap, and free in a few states | pH, buffer pH, P, K, Ca, Mg, organic matter, CEC, plus a rate recommendation | High. Calibrated to regional soils | Every gardener, every 3 years. The default |
| Private lab test | Two to three times an extension test | Same, often with micronutrients and soil biology add-ons | High | Farms, commercial growers, or states with no public lab |
| Chemical color-change kit | About the same as an extension test | pH within roughly 0.5 point; vague nutrient bands | Fair for pH, poor for nutrients | Comparing beds, checking whether pH moved after liming |
| Probe pH meter | The cheapest thing you can buy | Conductivity converted to a pH estimate | Poor. Often reads near 7 regardless | Rough moisture checks. Not amendment decisions |
| Vinegar and baking soda | Free | Strongly alkaline or strongly acidic only | Poor as a pH test, useful as a screen | Detecting free lime before you waste money on sulfur |
| Jar (sedimentation) test | Free | Sand, silt, and clay percentages | Good | Understanding drainage and watering behavior |
| Ribbon test | Free | Soil texture by feel | Good with practice | A 60-second read on any new bed |
| Percolation test | Free | Drainage rate in inches per hour | Good | Siting beds, diagnosing root rot and standing water |
When to Test Garden Soil
Fall is the ideal window, and it isn't close. Lime needs three to six months of moisture and freeze-thaw cycles to react and move the pH. Elemental sulfur needs soil bacteria and warm temperatures, so it wants even longer. Test in September or October, apply what the report says in October or November, and spring planting arrives on soil that has already changed.
Test in spring only if you missed fall. You'll still learn what's there, but a lime recommendation applied in April does maybe a third of its work before you plant.
Retest every three years in an established bed. Soil chemistry moves slowly, and annual testing mostly buys you noise. Test sooner if you've done something big: a truckload of compost, a sulfur or lime application you want to verify, a new bed on unknown ground, or a season of unexplained problems.
Avoid sampling within six to eight weeks of applying lime or fertilizer. You'll measure the amendment sitting on top of the soil rather than the soil itself.
How to Take a Soil Sample (This Is Where Most People Go Wrong)
The lab tests one cup of soil and reports on hundreds of square feet. Everything depends on that cup being representative.
Take 10 to 15 cores from across the area. Walk a zigzag or a rough W across the bed and pull a core every few steps. One scoop from one spot describes one spot, and soil varies more across a single bed than most gardeners expect.
Go 6 inches deep for garden beds and 4 inches for lawns. Depth matters because nutrients stratify. A shallow scoop in a mulched bed reads high on organic matter and phosphorus; a deep one dilutes the root zone with subsoil. Push a trowel in, pull it back to open a slot, then slice a thin, even wedge from the full depth of the wall. That vertical slice is a core. An angled scoop from the top 2 inches is not.
Mix in a clean plastic bucket. Not galvanized metal, which is zinc-coated and will contaminate the zinc reading. Skip brass and bronze tools too, since those add copper and zinc. A plastic bucket and a stainless or plain steel trowel are all you need. If the bucket last held fertilizer or a herbicide mix, use a different bucket.
Sample problem areas separately. If a third of the plot always sulks, that's its own sample with its own label. Blending it into the good soil averages the problem away, which is exactly what you don't want. Two tests that show pH 5.4 in the bad corner and 6.6 everywhere else is a diagnosis. One blended test showing 6.2 is a shrug.
Air dry, don't bake. Spread the mix out for a day or two at room temperature, roughly 65°F to 75°F. Heat above about 100°F changes potassium readings. No oven, no dashboard of a hot car.
Label everything and keep notes. Write down what grew there and what you added last year. Most labs give you a field ID box, and future you will want it at the next test.
How to Check Soil pH at Home Between Lab Tests
There's a legitimate use for a home kit: tracking. You lime in fall based on a lab report, and next spring you want to know whether the pH actually moved before you commit to a second round.
Use a color-change kit, distilled water (tap water has its own pH and mineral load, and it will skew the result, which is also why a Venus fly trap gets nothing but distilled), and the same procedure every time. Test the same three spots. You're not looking for an absolute number, you're looking for direction and rough size of change.
If you want a slightly better home pH reading, mix one part soil with one part distilled water by volume, stir, let it sit 30 minutes, and test the liquid rather than the mud. That's roughly what a lab does, minus the calibrated instrument.
And know the limit: no home method measures buffer pH, so no home method can tell you a lime rate. That's the wall you keep hitting.
How to Read Your Soil Test Report
Reports look intimidating and are mostly six numbers plus a paragraph.
Soil pH. The active acidity in the soil water right now. Most vegetables want 6.0 to 7.0. Tomatoes want 6.2 to 6.8, which our guide to soil pH for tomatoes covers in depth. Blueberries want 4.5 to 5.5 and should be their own separate test.
Buffer pH (or lime index). The most useful number nobody understands. Soil pH measures the acidity in solution. Buffer pH measures the reserve acidity held on clay and organic matter particles, which is what keeps pushing the pH back down after you lime. Two soils can both read pH 5.8 and need wildly different amounts of lime because one is sand with almost no reserve and the other is heavy clay with an enormous one. The lab adds a buffer solution, sees how far the pH resists, and converts that to your lime rate. If a report gives you a lime recommendation, buffer pH is where it came from.
Organic matter. Reported as a percentage by weight. Most native mineral soils run 1% to 3%. A well-managed vegetable bed usually lands between 4% and 6%, and that's a good target. Above about 8% you're often looking at a bed built mostly from compost, which holds water and nutrients beautifully but can run high in phosphorus and salts. Organic matter is the number that responds to what you do, so it's the one worth watching across tests.
Phosphorus and potassium. Reported in parts per million or pounds per acre, and then, crucially, as an index: low, medium, optimum, or high. Chase the index, not the raw number, because the extraction method varies by lab and region and the numbers aren't comparable between labs. Phosphorus is the one to watch in the other direction: it builds up in compost-heavy gardens and doesn't leach, and "excessive" phosphorus is a real water quality issue as well as a nutrient-lockup issue. If yours reads high, stop adding manure and bone meal.
CEC (cation exchange capacity). In plain language, CEC is how many parking spaces your soil has for positively charged nutrients like calcium, magnesium, potassium, and ammonium. It's measured in meq per 100 g. Sandy soil runs about 1 to 5 and has almost no parking, which is why sand needs small, frequent feeding and leaches fast. Loam runs about 5 to 15. Clay and high-organic soils run 15 to 30 or more, hold nutrients well, and need more lime to change pH because there's more reserve acidity parked on all those spaces. You don't manage CEC directly. You raise it slowly by adding organic matter.
The recommendation section. Read this first, act on it, and treat the numbers above as the explanation. It converts everything into pounds per 1,000 square feet of a specific material for the crop you named.
Three DIY Soil Tests That Are Genuinely Worth Doing
Home chemistry is weak. Home physics is excellent, and free. These three tell you things a lab report won't.
The jar test for sand, silt, and clay
Fill a straight-sided quart jar one-third with soil, picking out stones and roots. Add water to about two inches from the top, plus a teaspoon of dish soap or powdered water softener as a dispersant. Shake hard for two full minutes and set it on a shelf.
Sand settles in about a minute. Mark the line. Silt settles over the next two hours. Mark it. Clay can take 24 to 48 hours to clear. Mark the final line, measure each band, and convert to percentages of the total.
Roughly 40% sand, 40% silt, 20% clay is loam, the texture everyone wants. Over about 30% clay and you have a soil that holds water and nutrients well, compacts badly, and must not be worked wet. Over about 70% sand and you're watering more and feeding lighter, and organic matter is your main lever.
The ribbon test
Faster, and good enough for most decisions. Take a walnut-sized lump of moist soil and work it into a ball. If it won't hold a ball at all, it's sand. Squeeze the ball out between your thumb and the side of your forefinger into a flat ribbon and let it extend until it breaks under its own weight.
Under 1 inch of ribbon means loam. Between 1 and 2 inches means clay loam. Over 2 inches, and especially if the ribbon feels slick, means clay. Rub a pinch with water: gritty is sand, smooth and floury is silt, sticky and slick is clay.
The percolation test for drainage
Dig a hole about 12 inches deep and 8 to 12 inches wide. Fill it with water and let it drain completely to pre-soak the surrounding soil. Then refill it and measure how far the water level drops per hour with a ruler.
- 1 to 3 inches per hour: good drainage. Plant what you like.
- Under 1 inch per hour: poor drainage. Raised beds, or fix the compaction, before you blame anything on nutrients.
- Over 4 inches per hour: drains too fast. Expect drought stress and nutrient leaching, and build organic matter.
Drainage explains more garden failures than fertility does, and it never shows up on a chemistry report. Worth running before you commit to a layout, which our garden layout planning guide gets into.
What a Soil Test Will Not Tell You
Nitrogen. Most soil labs don't report it, and the ones that do attach heavy caveats. Nitrate is water soluble and constantly moving: it leaches with rain, it's created and consumed by soil microbes on a daily cycle, and it swings with temperature. A nitrate number from a sample taken in September describes September, not next May. Nitrogen gets managed by practice (compost, cover crops, split applications) rather than by measurement in home gardens.
Pests and disease. No standard test looks for root knot nematodes, verticillium, club root, or grubs. Some labs offer nematode assays as a separate paid service, and plant disease diagnosis is a different lab entirely. Your county extension office can point you to both.
Physical problems. Compaction, hardpan, and poor drainage don't appear on a chemistry report. That's the percolation test's job.
Contamination, unless you ask. Lead, arsenic, and other heavy metals are a paid add-on, priced in the same range as the base test itself. Pay for it once if you're growing food in an urban lot, near an old painted structure, or beside a road that was busy during the leaded gasoline era.
Whether calcium will fix your blossom end rot. It almost never does, since the cause is usually uneven watering rather than absent soil calcium. Our blossom end rot guide walks through why.
Worked Example: A 20 by 30 Vegetable Plot in September
Say you garden a 20 by 30 foot vegetable plot, which is 600 square feet, and the tomatoes and beans both underperformed this year.
Mid-September, sampling. You walk a W across the plot and pull 12 cores at 6 inches with a trowel into a clean plastic bucket. The northwest corner has always been the bad end, so you pull 8 separate cores there into a second bucket and label them Plot A (main) and Plot B (northwest corner). You mix each, air dry them on newspaper for two days, bag a cup and a half of each, and mail both with the form marked "vegetable garden." Two samples, two fees, one envelope.
Late September, the report arrives. Plot A comes back:
| Measure | Result | Reading |
|---|---|---|
| Soil pH | 5.8 | Below the 6.0 to 7.0 target |
| Buffer pH | 6.6 | Moderate reserve acidity |
| Organic matter | 2.4% | Low for a vegetable bed |
| Phosphorus | 18 ppm | Low |
| Potassium | 96 ppm | Medium |
| CEC | 11 meq/100 g | Loam, decent holding capacity |
| Recommendation | 70 lb ground limestone per 1,000 sq ft, plus phosphorus |
Plot B reads pH 5.2 with the same low phosphorus, which is the answer to why that corner sulks. It needs its own heavier lime rate rather than an average.
Doing the math. 70 pounds per 1,000 square feet across 600 square feet works out to 600 divided by 1,000, times 70, which is 42 pounds of limestone for the main plot. A 40-pound bag plus a little. The northwest corner's separate rate gets applied only there.
The fall timeline:
- Early October: spread the 42 pounds of pelletized limestone and work it into the top 6 inches. Lime moves through soil very slowly, so incorporating it matters more than the brand does.
- Same week: spread 2 to 3 inches of finished compost across the plot and turn it in. That's your organic matter fix (2.4% to a target above 4%) and it addresses part of the phosphorus at the same time.
- October to November: sow a cover crop of winter rye or crimson clover in the open ground. Free organic matter, and it holds soil over winter.
- December to March: freeze-thaw cycles do the work. Nothing for you to do.
- Late March: turn in the cover crop two to three weeks before planting.
- Late April or May: plant on your zone's schedule. Our planting calendar by zone has the dates.
- September, three years later: retest. Expect pH around 6.4 to 6.6 and organic matter noticeably up.
Total spend: two lab fees and a couple of bags of lime. That replaced three seasons of buying fertilizer that was never the problem. With the report in hand, our vegetable garden fertilizer schedule turns the recommendation into a season of dates.
FAQ
How much does a garden soil test cost?
Less than most people expect, and we do not publish the figure because every state sets its own. An extension lab test is the cheapest useful option in almost every state, and a few states test free or at a reduced rate for residents. A private lab runs roughly two to three times that, with more options attached. Add-ons like a lead screen or a nematode assay are each priced in the same range as the base test. To get your own number in five minutes, search for your state's name plus "extension soil testing lab" and open the current fee schedule, which is published on the lab's own site along with the submission form.
How do I test soil pH without a kit?
You can screen for extremes with the vinegar and baking soda method: vinegar fizzing on dry soil means alkaline (above about 7.5), and baking soda fizzing in a wet slurry means strongly acidic (below about 5). Most soil does neither, and that non-result covers the entire 5.5 to 7.4 range where your decisions actually live. It's a screen, not a measurement.
Are cheap soil pH meters accurate?
Generally no. The two-prong probe types measure electrical conductivity between dissimilar metals rather than pH, so the reading shifts with moisture, temperature, and salts, and they frequently land near 7 no matter what's in the pot. A color-change chemical kit is a better home option, and neither can give you a lime rate.
When is the best time to test garden soil?
Fall, ideally September or October. Lime takes three to six months to move soil pH and sulfur takes longer, so a fall test gives the amendment all winter to work before spring planting. Spring testing still tells you what's there, but most of the correction lands too late for that season.
How often should I test my soil?
Every three years for an established bed. Test sooner after a major amendment, when starting a new bed on unknown ground, or when a problem shows up that you can't explain.
How much soil do I need to send to the lab?
About 1 to 2 cups of the mixed composite, from 10 to 15 cores taken across the area. Check your lab's form, since the required amount varies slightly. Air dry it first at room temperature and never in an oven or a hot car.
Do I need a separate test for my lawn and my vegetable garden?
Yes. They're managed differently, sampled at different depths (4 inches for lawn, 6 inches for beds), and the recommendations are calibrated to different crops. Same goes for any acid-loving bed like blueberries or azaleas.
Why doesn't my soil test report show nitrogen?
Because a nitrogen number would be out of date almost immediately. Nitrate leaches with rainfall and is constantly cycled by soil microbes, so a reading taken in fall says nothing useful about next spring. Manage nitrogen with compost, cover crops, and split feeding rather than trying to measure it.